· 6 min read
Pierre-Gilles Leymarie

Hi !

In this tutorial I want to show you that it's possible to integrate Gladys Assistant with other cool open-source software like Node-RED.

Start Gladys Assistant

You need to have a Gladys Assistant instance for this tutorial.

You can install Gladys Assistant on a Raspberry Pi with our pre-built Raspberry Pi OS image, or use Docker to spin up a Gladys container.

To get started, follow our documentation.

Start Node-RED

We'll use Docker to install Node-RED.

Start Node-RED docker image

Node-RED has a Getting Started section on their website, but if you want to simply use Docker, you can run this command:

docker run -d \
--log-opt max-size=10m \
--restart=always \
--privileged \
-u root \
--network=host \
--name node_red \
-v /var/lib/node-red:/data \
nodered/node-red

A few details:

  • We used the "privileged" mode in case you want to run some home automation modules on your machine, and sometimes it needs more permissions to access the system. If you don't need it, you can safely remove it.
  • "-u root" is used to start the container as the "root" user. You can change "root" to the current user of your Linux machine. On a Raspberry Pi, it'll probably be "pi".
  • "/var/lib/node-red": The folder where Node-RED data will be saved.

Secure Node-RED

By default, Node-RED is open. We need to secure it so it's not open for everyone to use.

Node-RED admin needs to be configured in command-line.

You first need to hash your password by running the following command:

docker exec -it node_red node-red admin hash-pw

Enter your password.

It'll then display a string like:

$2b$08$6yOj6Z/ya7eDdn3eKwy4WukuyHUxiJOcZyHFiHPaCQBckKpLxUPly

This is a hashed version of the password "test"

Open the file /var/lib/node-red/settings.js by doing:

nano /var/lib/node-red/settings.js

If it doesn't work, maybe nano is not installed on your machine.

On Ubuntu/Debian, run:

sudo apt-get -y install nano

Go to the line with:

//adminAuth: {
// type: "credentials",
// users: [{
// username: "admin",
// password: "$2a$08$zZWtXTja0fB1pzD4sHCMyOCMYz2Z6dNbM6tl8sJogENOMcxWV9DN.",
// permissions: "*"
// }]
//},

Un-comment those line, and replace the password with the hashed password you generated earlier.

You should have something that looks like this:

adminAuth: {
type: "credentials",
users: [{
username: "admin",
password: "$2b$08$6yOj6Z/ya7eDdn3eKwy4WukuyHUxiJOcZyHFiHPaCQBckKpLxUPly",
permissions: "*"
}]
},

Now restart node-red with the command:

docker restart node_red

And you should be good, Node-RED should be secured!

Accessing Node-RED

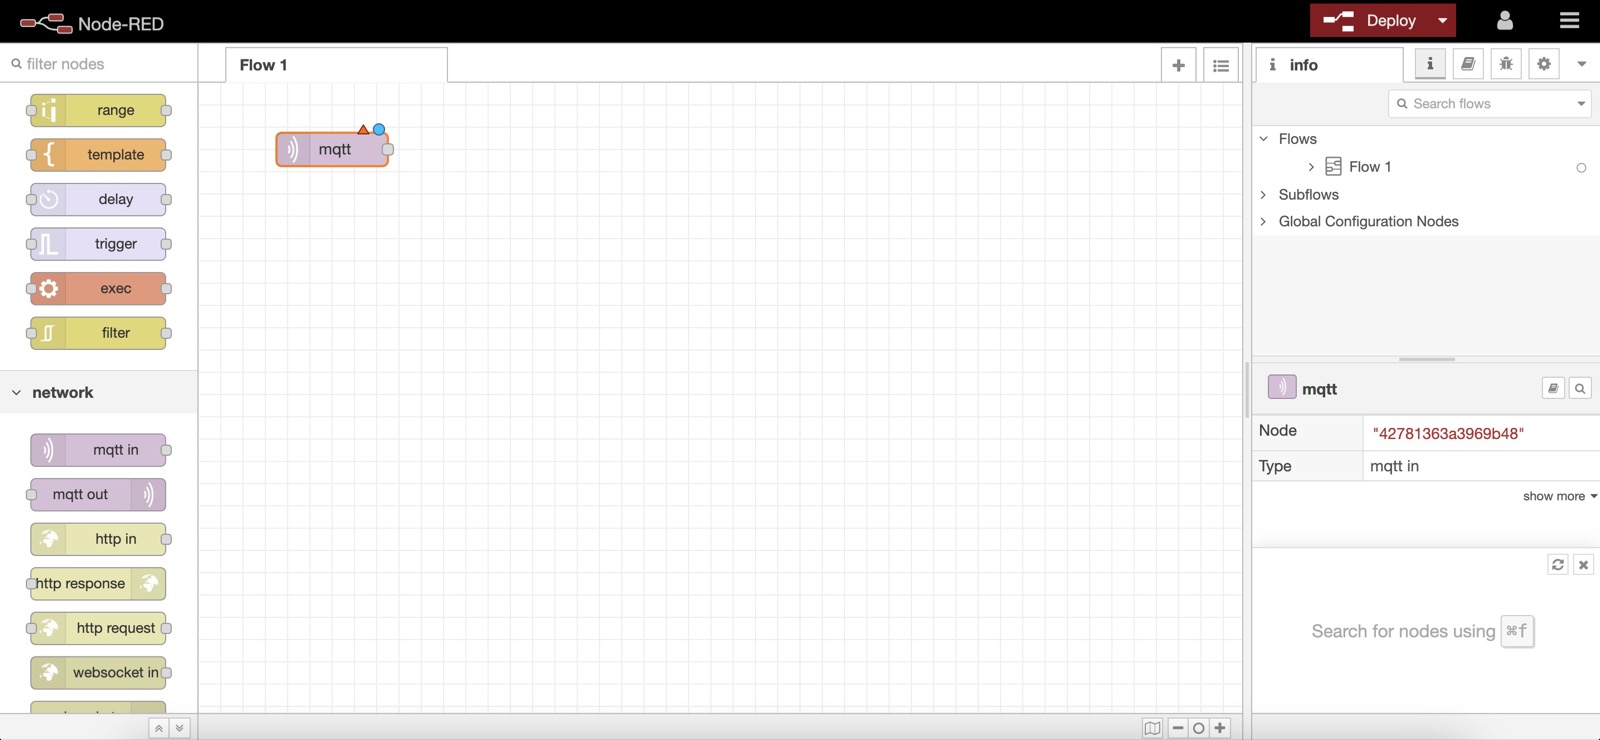
Congrats, Node-RED should be available at IP_OF_YOUR_MACHINE:1880 !

You should see a login screen.

Here, use the the login you previously set in the settings.js file.

For me, it's:

Username: admin
Password: test
Node-RED

Configure MQTT in Gladys Assistant

Now go to Gladys Assistant, and click on "Integrations" => "MQTT".

Go to the "Setup" tab, and click on the big blue button "Install broker in Docker" to setup a MQTT broker automatically.

You can also use a MQTT broker you already configured previously.

Create a MQTT device in Gladys Assistant

Back to the "Devices" tab in the MQTT integration, you can create a new device:

  • Name: "Lamp"
  • External ID: "mqtt-lamp"
  • Room: "Kitchen"
  • Features: Add a "Light On/Off" feature to be able to control
    • Name: "Lamp"
    • Feature external ID: "mqtt-lamp"
    • Minimum Value: 0
    • Maximum Value: 1
    • Is it a sensor ? No

Copy paste the MQTT topic displayed, you'll need it for later!

Control a device in Node-RED from Gladys Assistant

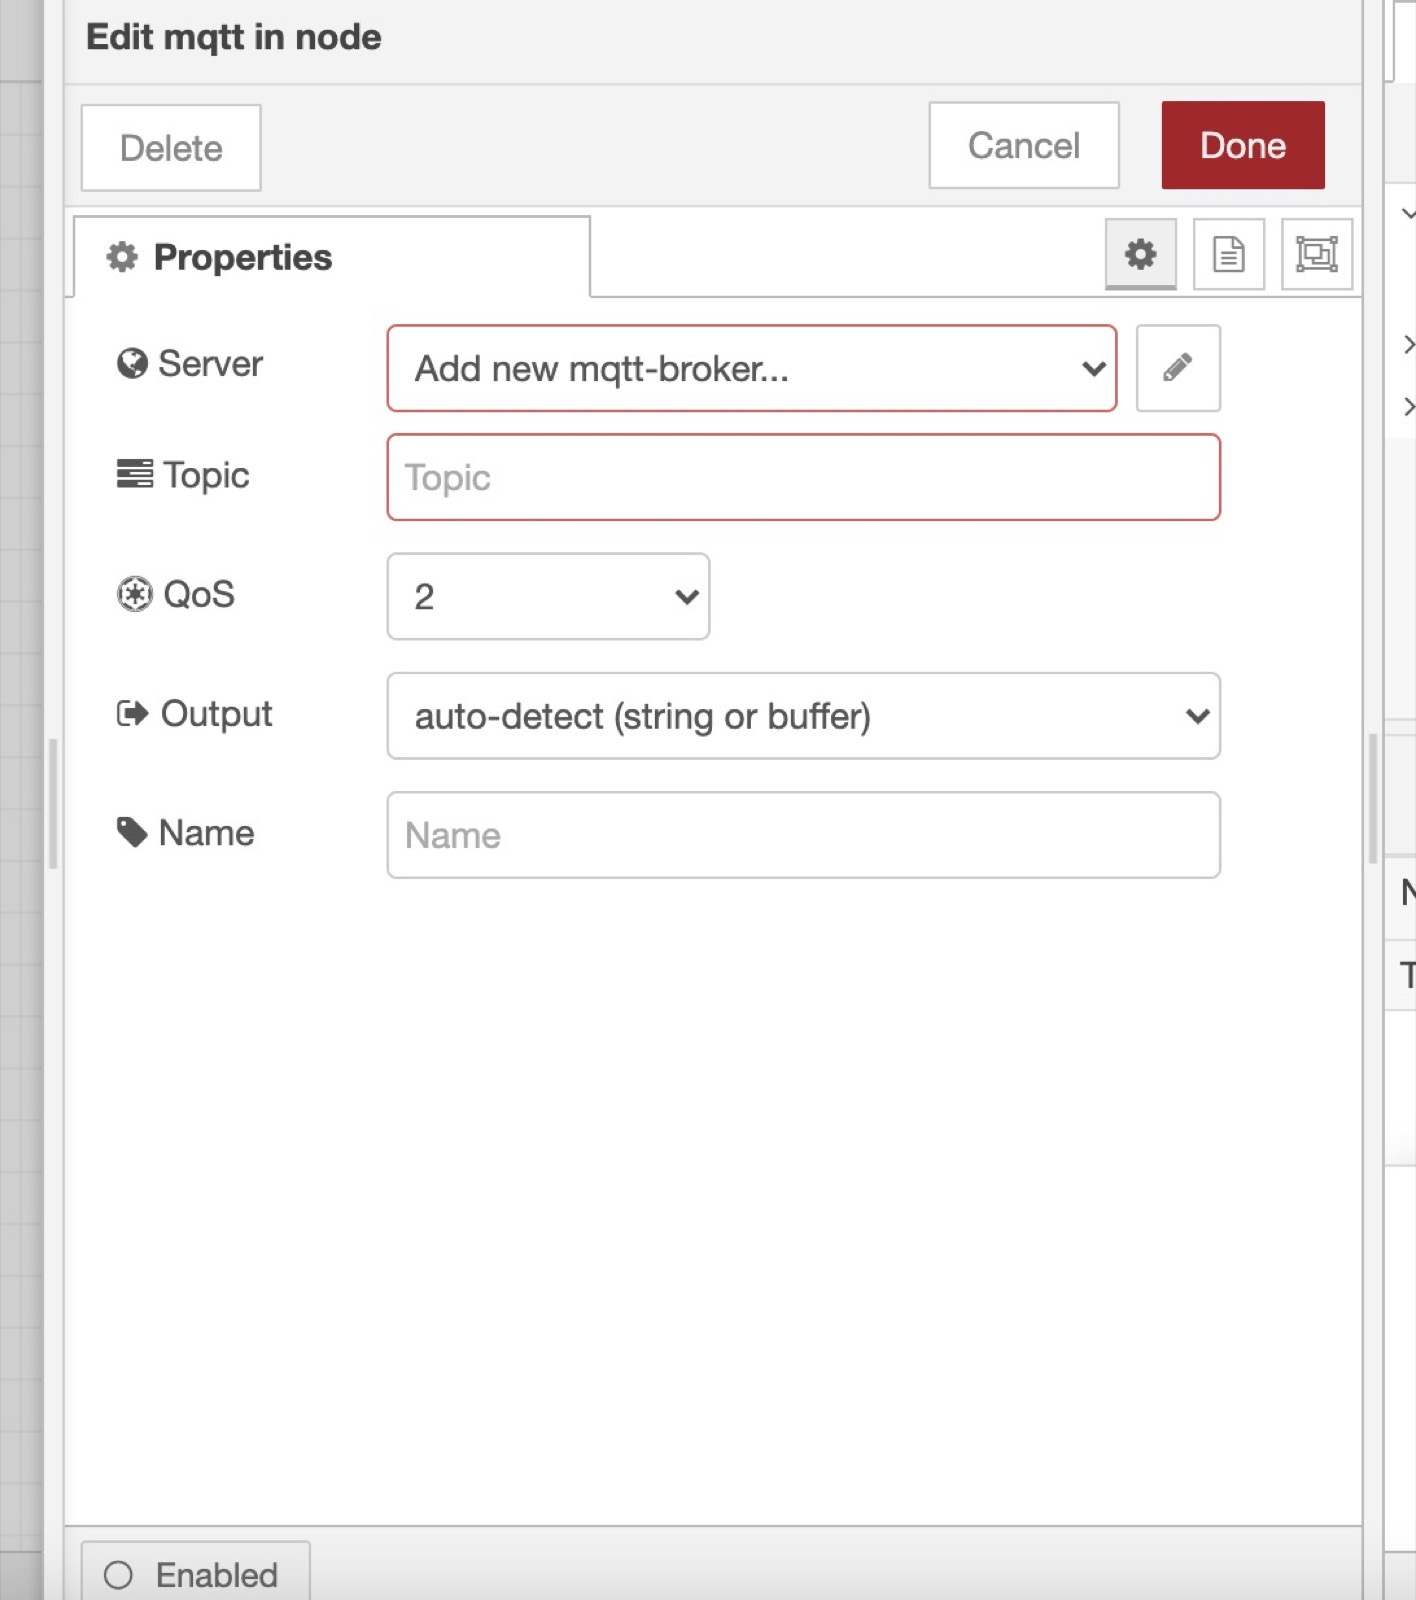
In Node-RED, you can create a "mqtt in" node to receive data from Gladys in MQTT.

You need to add the MQTT broker we just configured in Gladys by clicking on the little edit button (the pen icon next to Add new mqtt-broker):
Node-RED

  • The server is mqtt://localhost
  • Username: gladys
  • Password: Copy paste the generated password from Gladys.
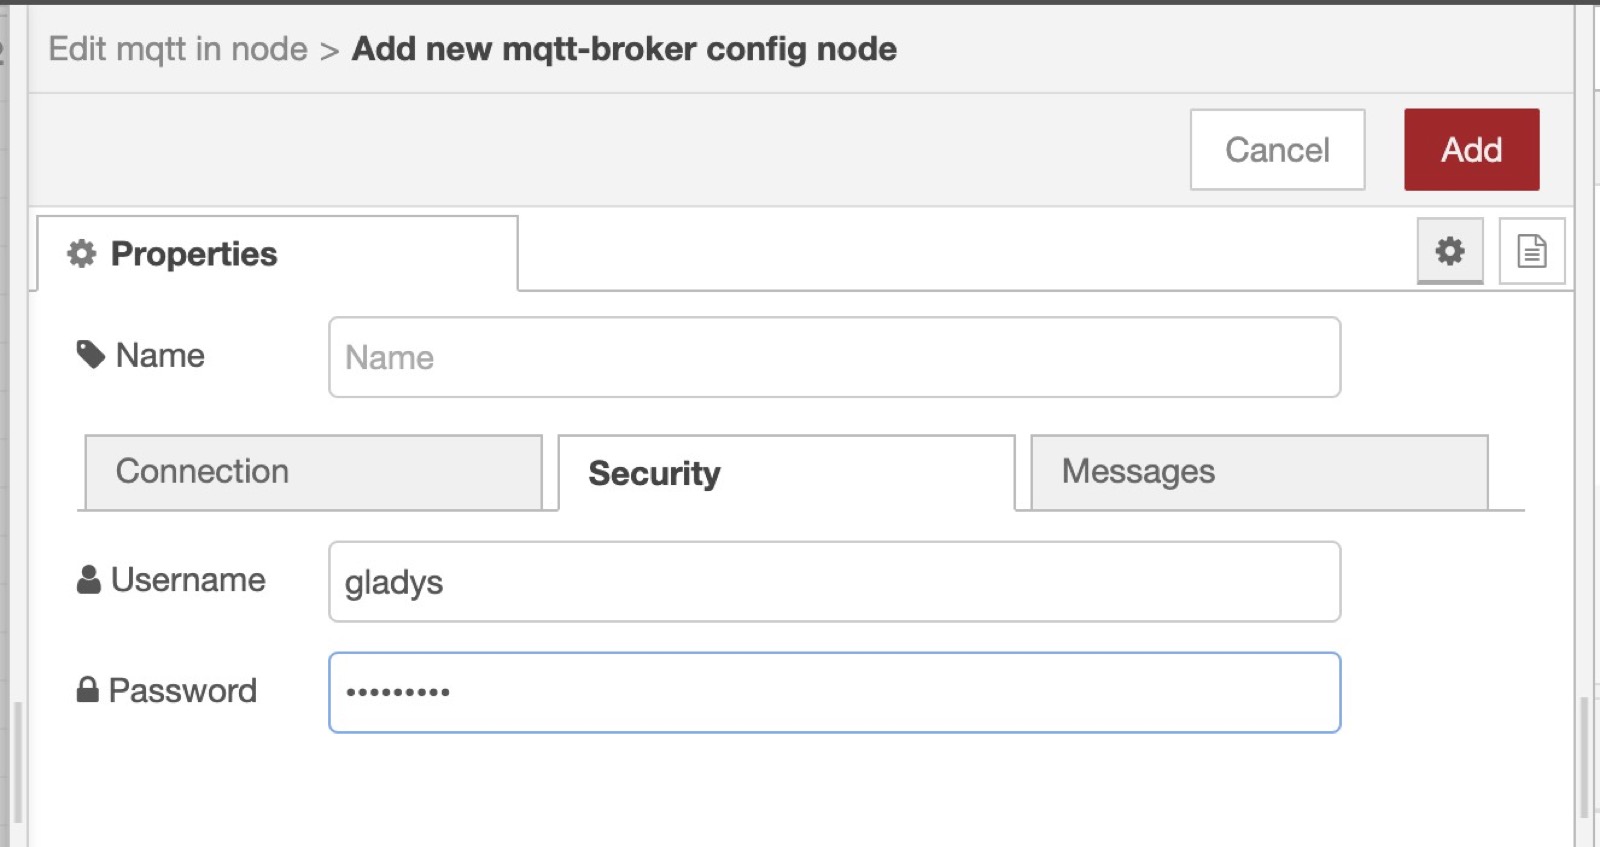
Node-RED

Finally, you need to paste the MQTT topic we copy pasted from Gladys when creating the device previously:
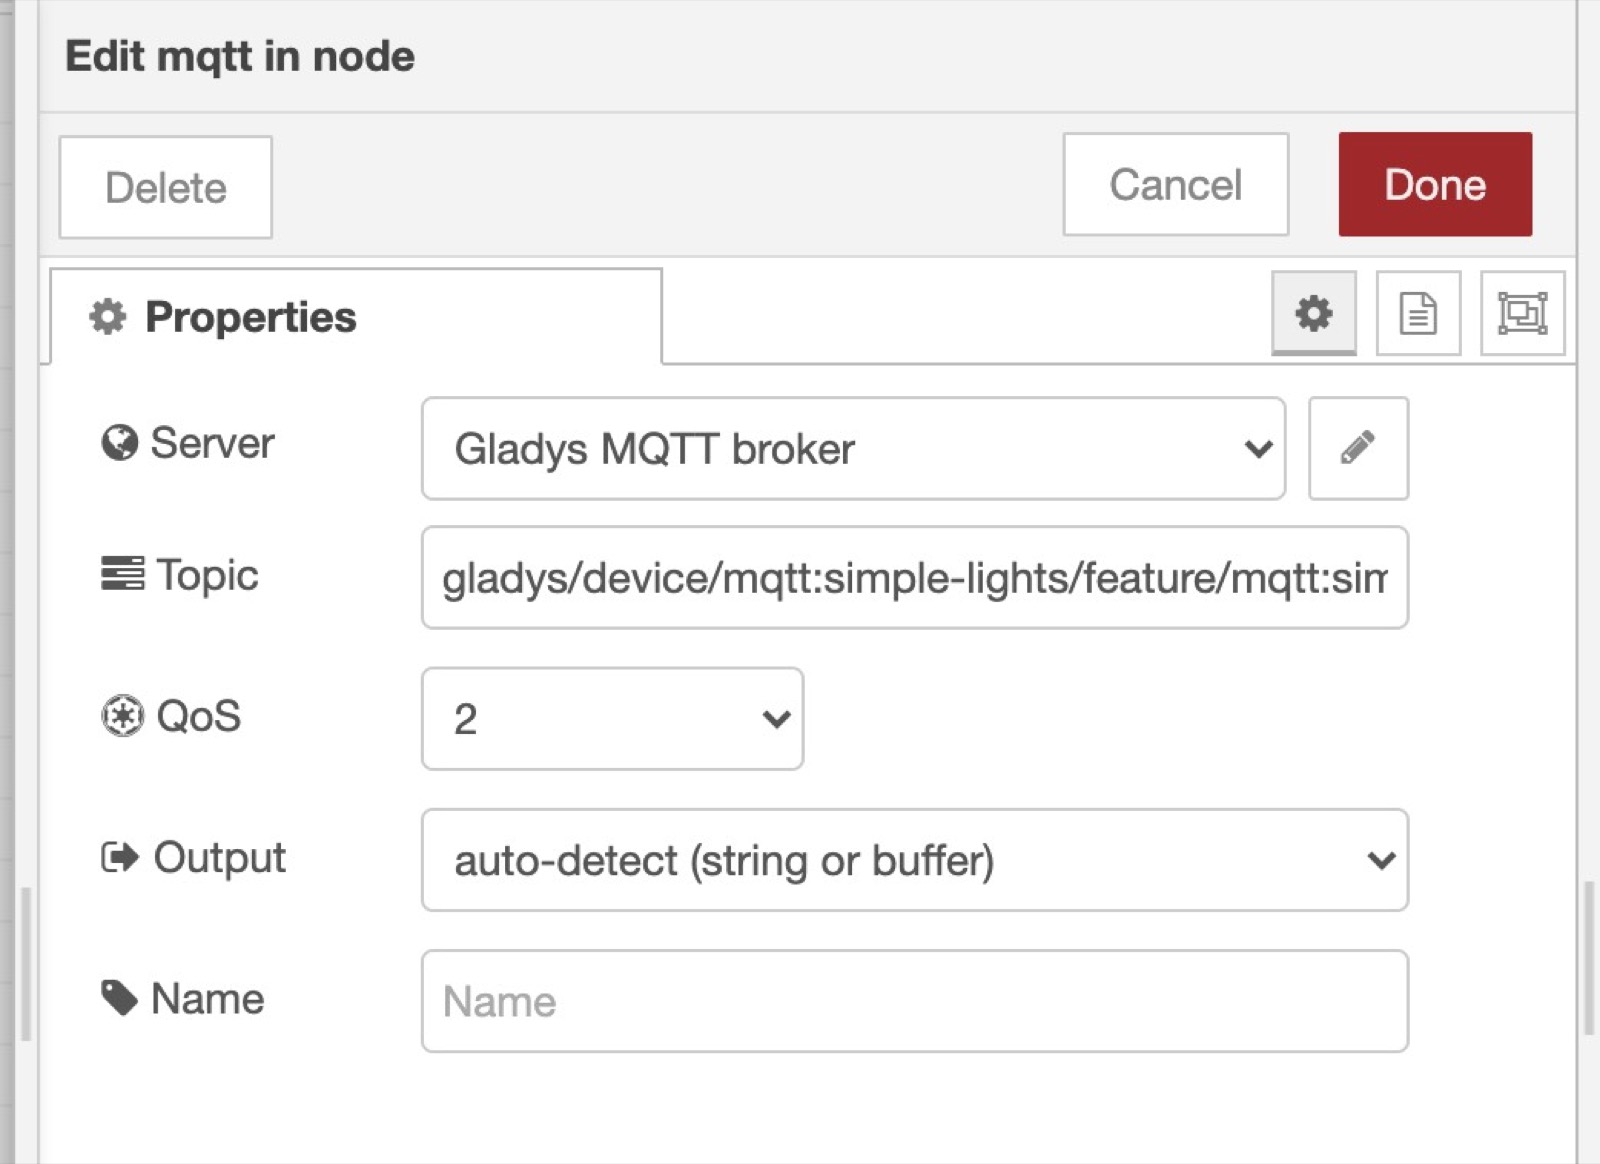
Node-RED

Now that this node is ready, you can connect pretty much anything to it, it'll be executed when a value is received on this MQTT topic.

You could connect a simple debug to see the data coming, or you can plug a switch case to do a different action if the data sent by Gladys is "0" (Turn Off) or "1" (Turn On).

Example:

Node-RED

Send sensor value from Node-RED to Gladys Assistant

We'll do the opposite scenario in Node-RED: Sending some data from Node-RED to Gladys.

Let's imagine that I want to measure the CPU usage of my machine, and send this CPU usage every 10 seconds to Gladys.

Create a Gladys MQTT device

I can create a Gladys a MQTT "CPU Usage" device:

  • Name: "CPU"
  • External ID: "mqtt-cpu"
  • Room: "Kitchen"
  • Features: Add a "Unknown" feature (you can choose anything here, it's just for the example)
    • Name: "CPU"
    • Feature external ID: "mqtt-cpu"
    • Minimum Value: 0
    • Maximum Value: 100
    • Is it a sensor ? yes

Copy paste the MQTT topic displayed, you'll need it for later!

Send a value from Node-RED every 15 seconds

Add an "Inject" node in Node-RED.

Set msg.payload to a random value (Here I put 15)

Add a repeat interval at the end of the node, every 15 seconds.
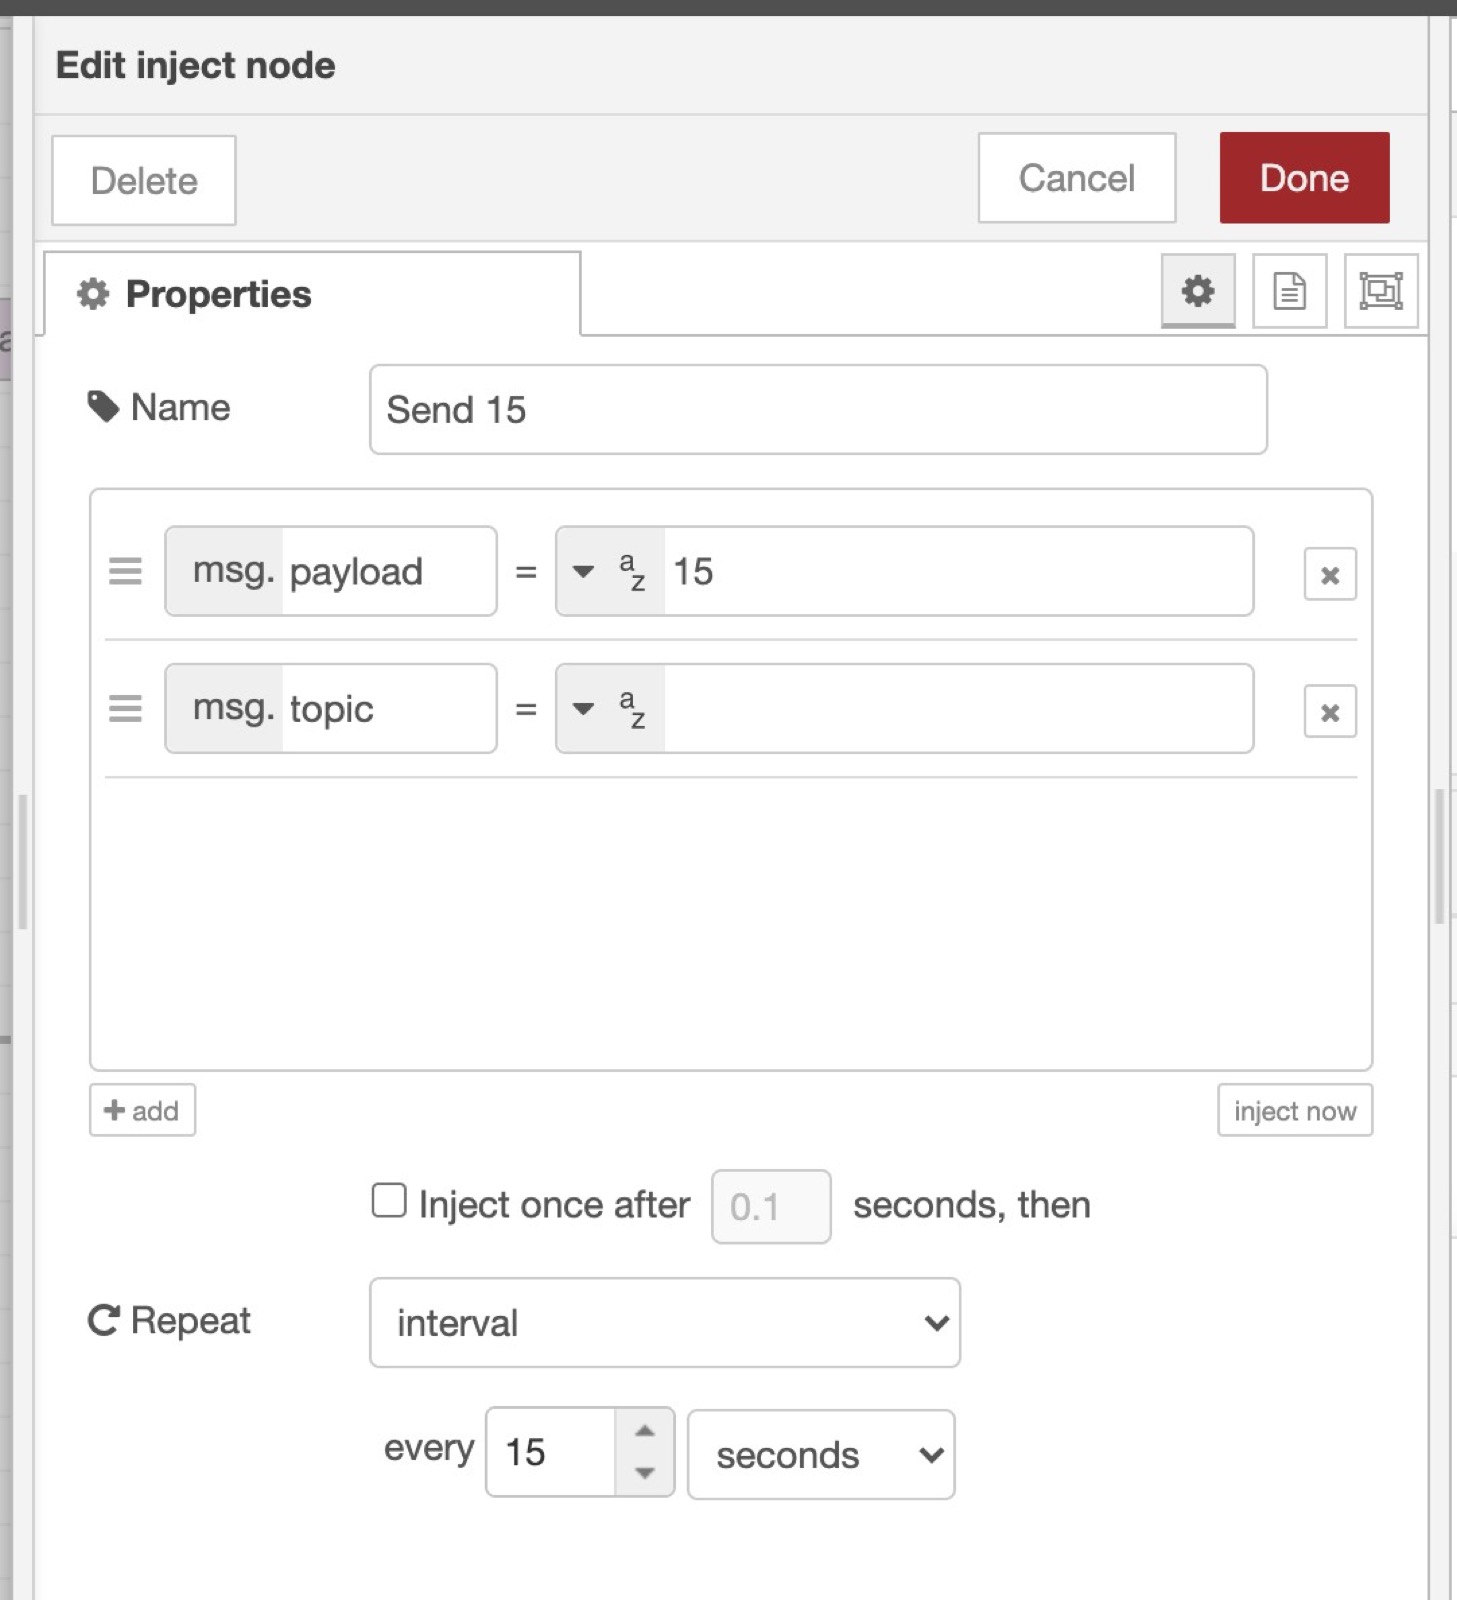
Node-RED

Now add a "mqtt out" node, and paste the MQTT topic we saved earlier when creating the CPU device.
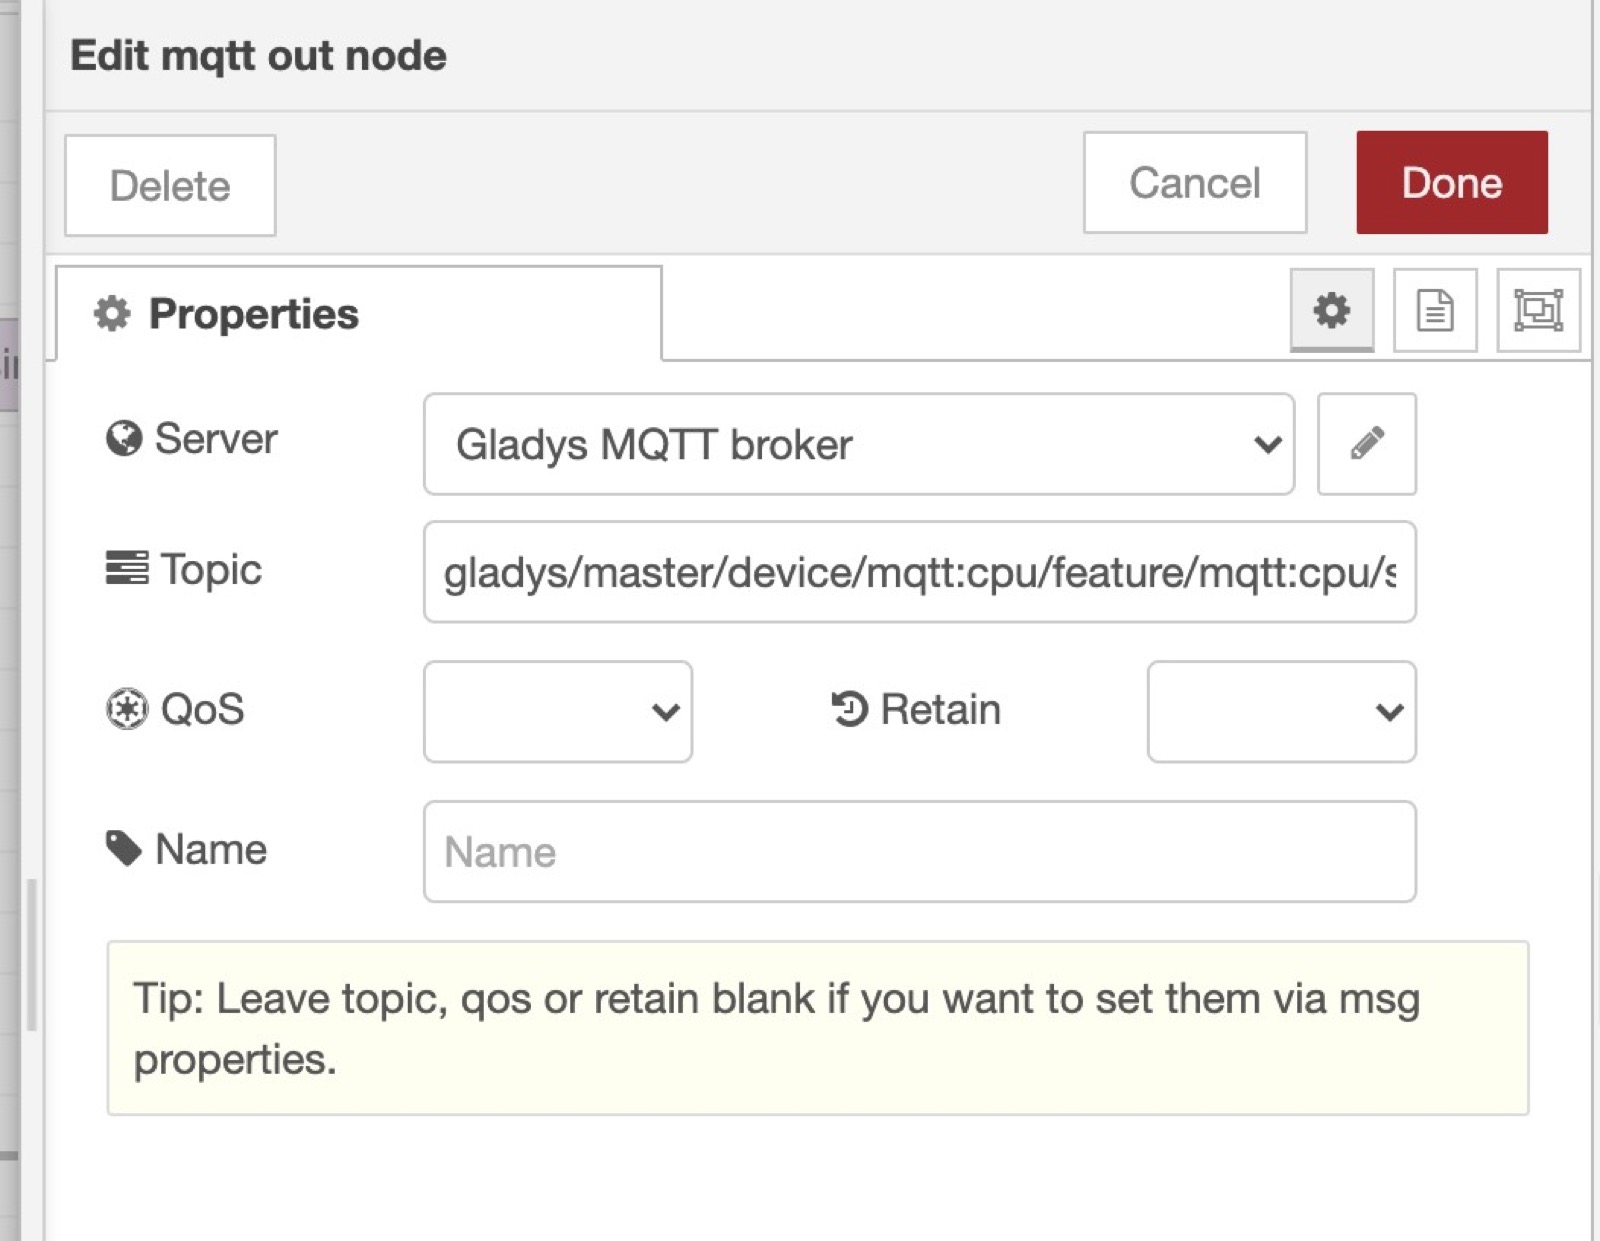
Node-RED

Connect the "Inject" node to the "mqtt out" node, and click "deploy".

Now you'll see that every 15 seconds, Node-RED will send the value "15" to Gladys in MQTT!

You can verify that by creating a dashboard and displaying the device we just created.

Going further

The goal of using Node-RED here is to be able to control devices that are not compatible with Gladys yet, so you might want to check their Node-RED modules to add a new compatibility in Gladys.

You can search their website

And then, in Node-RED, click on the top-right menu, then "Manage palette" to install new modules.

You can then use the installed modules in Node-RED in the left-panel.

· 3 min read
Pierre-Gilles Leymarie

Hi all,

Today we are releasing Gladys Assistant v4.5, a version that is bringing lots of new features to Gladys Assistant! Let me show you!

What's new in Gladys Assistant 4.5?

Multi-dashboard

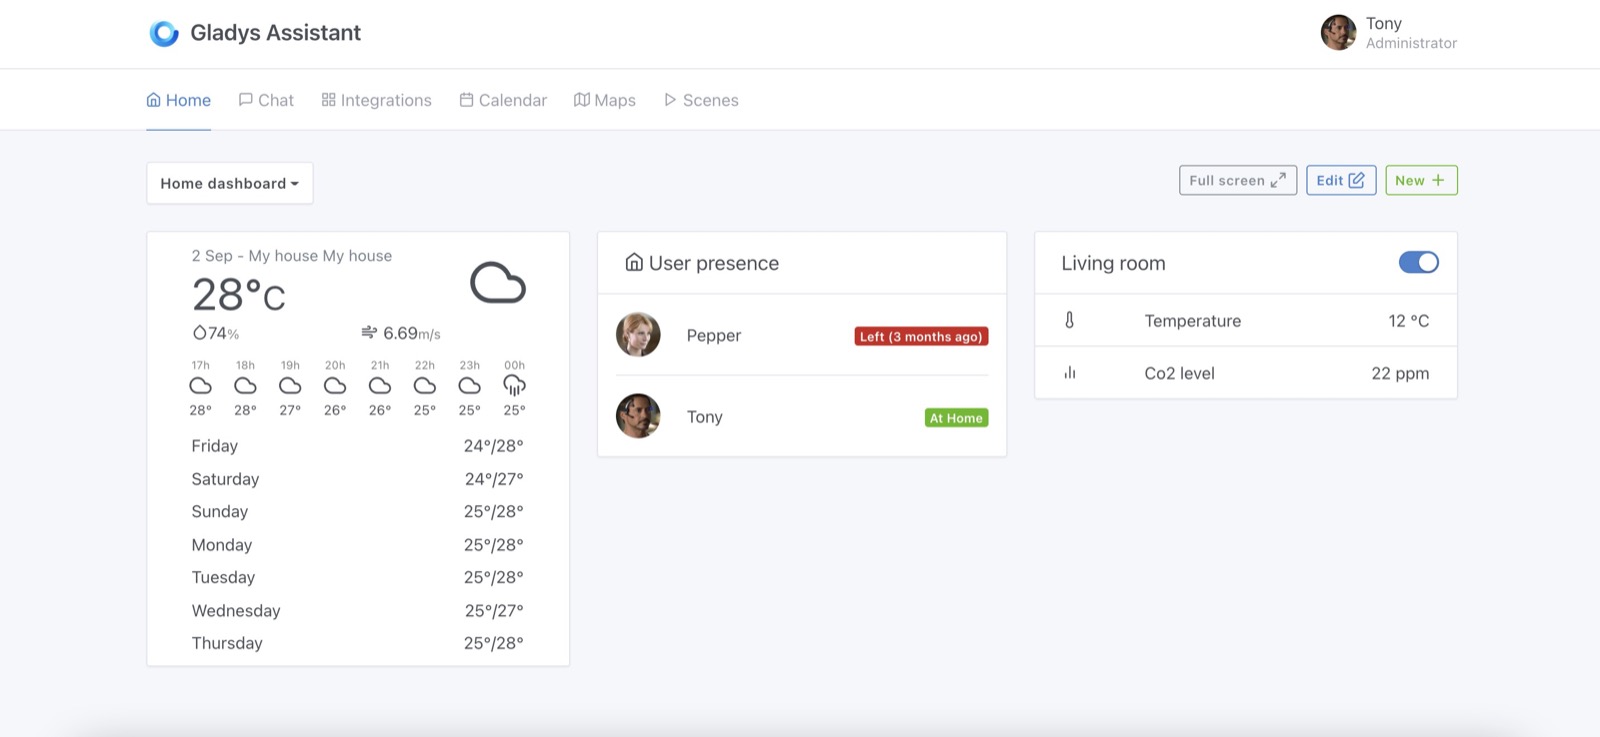
It's now possible to have multiples dashboards in Gladys Assistant.

Multi dashboard Gladys Assistant

You can create several dashboards, and each of them have a unique URL, so you can add bookmarks on your browser to your favorite dashboards.

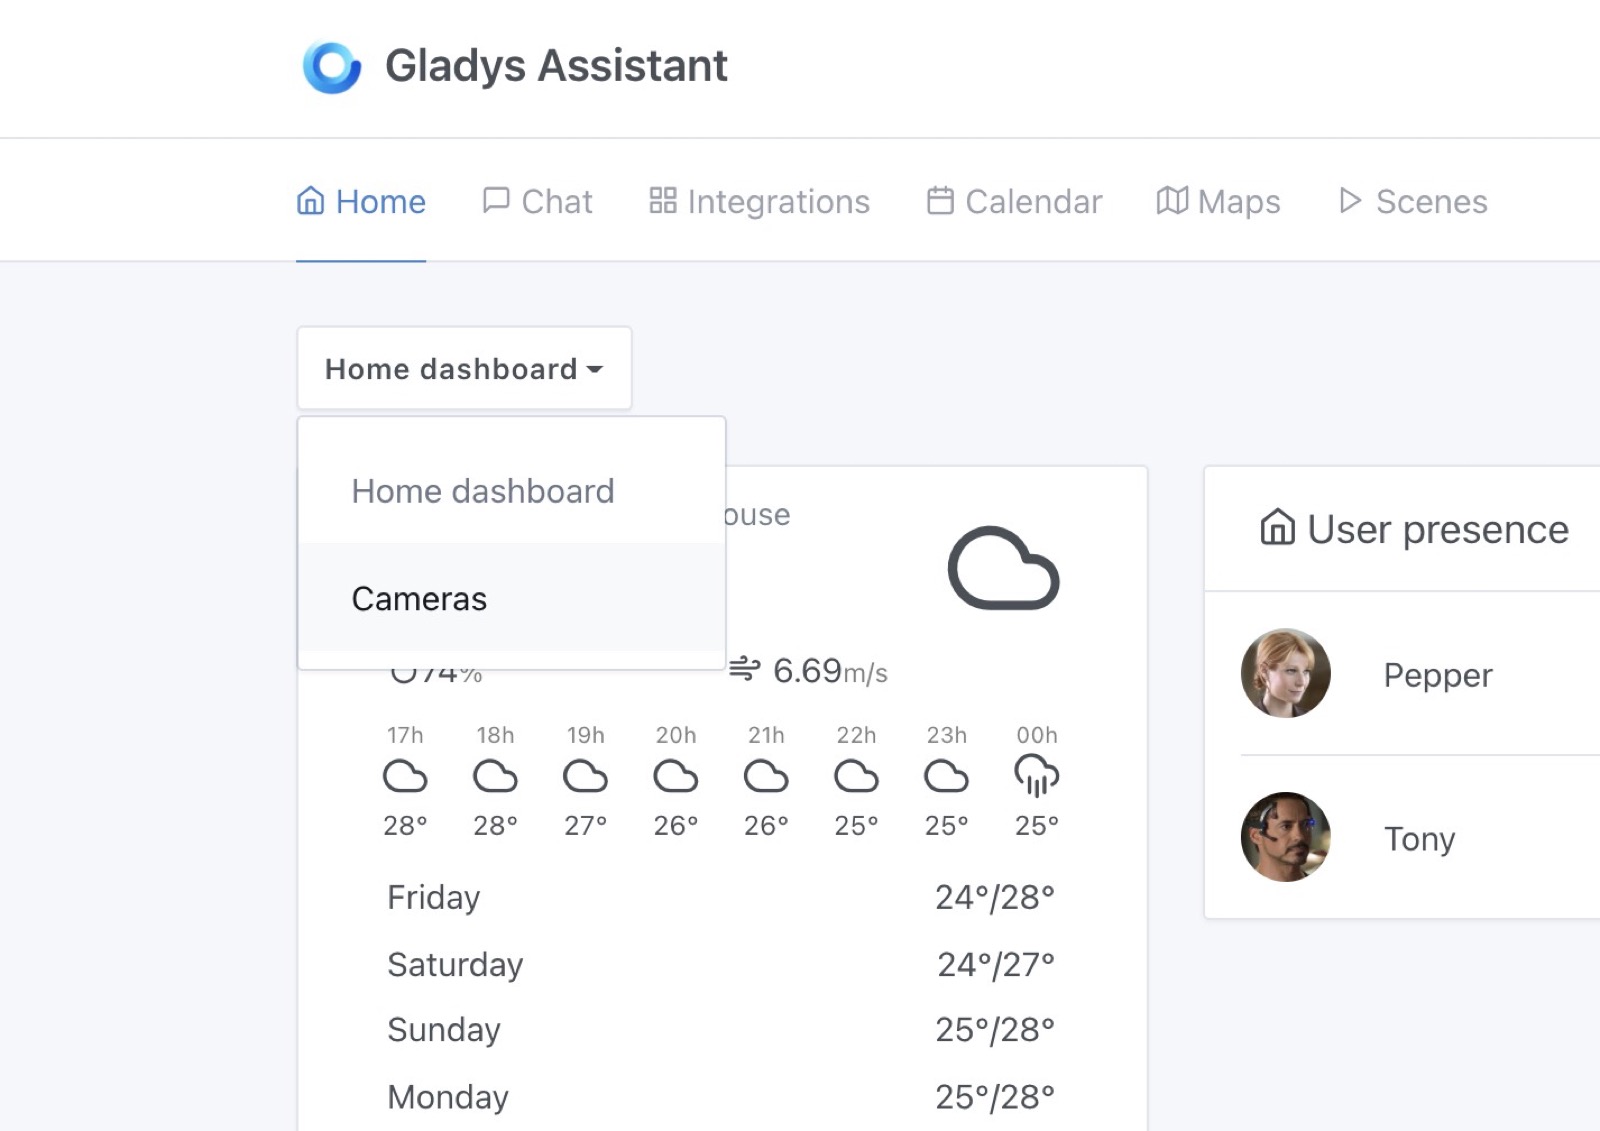
You can select the dashboard you want to display:

Switch dashboard Gladys Assistant

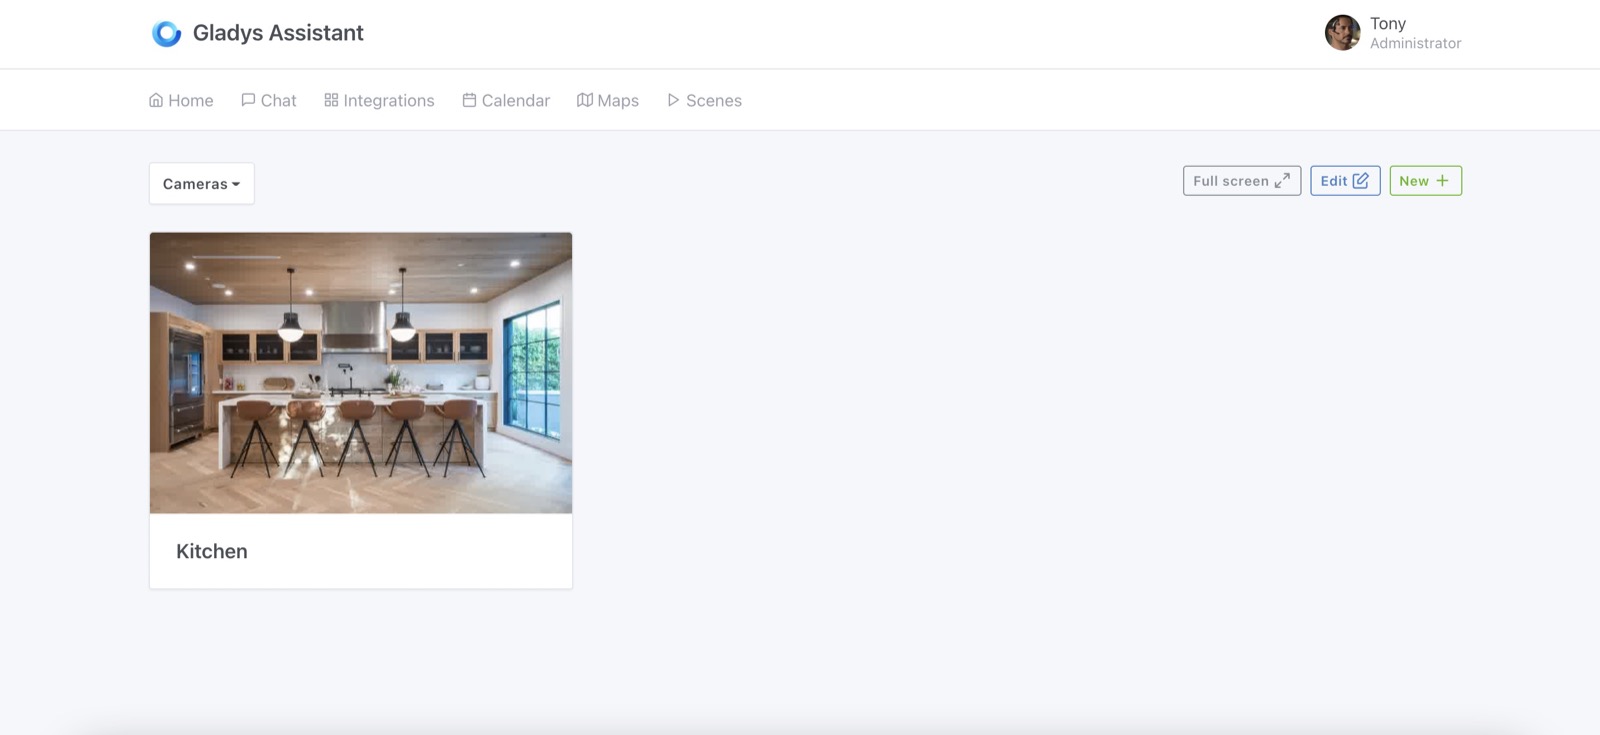
And it'll switch to another dashboard, easy!

Camera dashboard Gladys Assistant

Disabling a scene

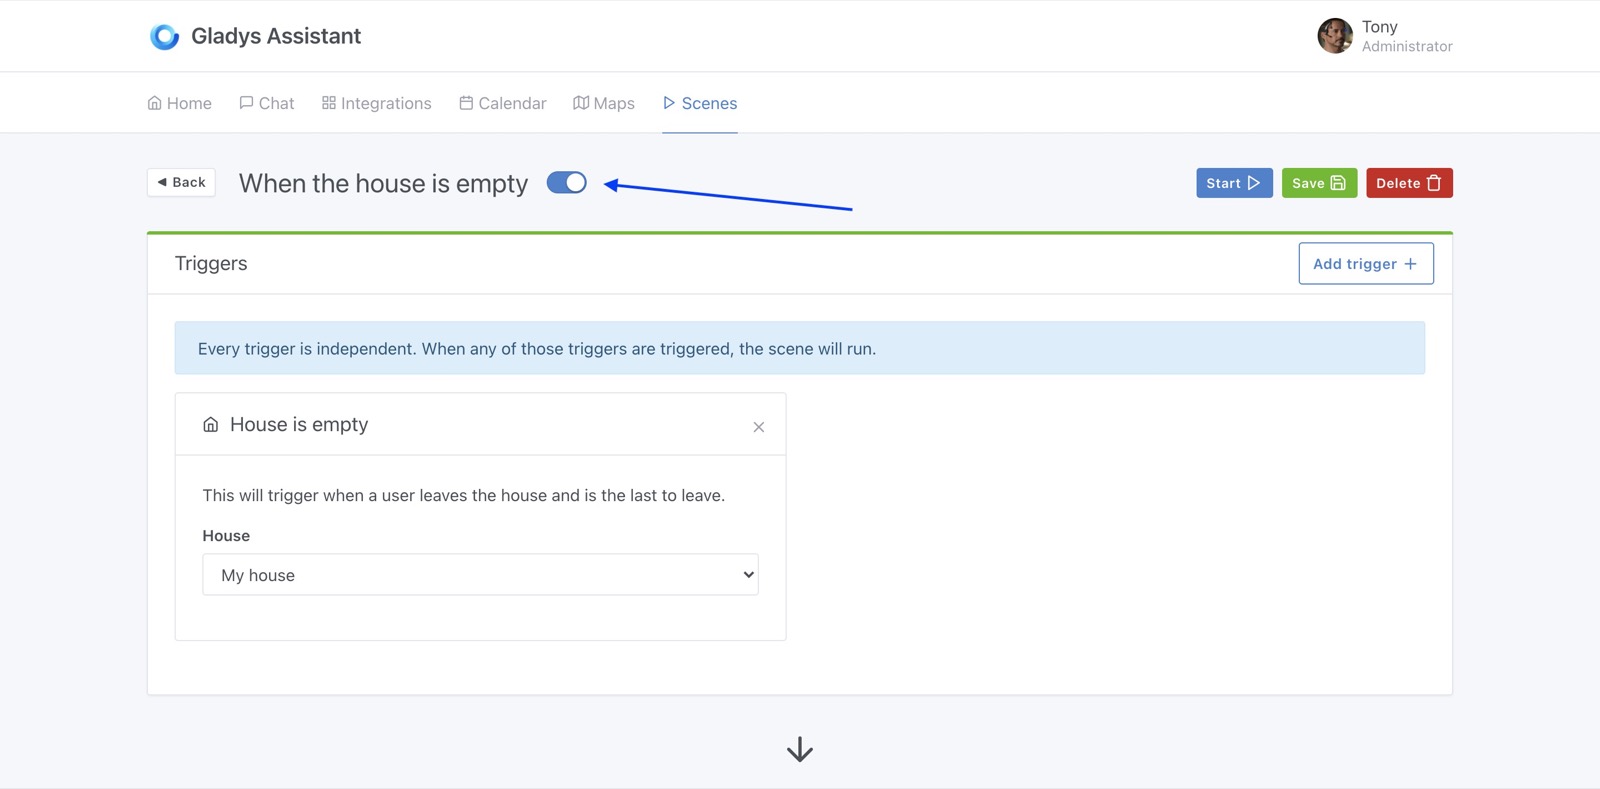
It was a highly requested feature, it's now possible to disable a scene in Gladys Assistant! Finally!

If you are prototyping a scene, going on holiday, or simply want to disable an annoying scene: you can do it now!

Disable scene Gladys Assistant

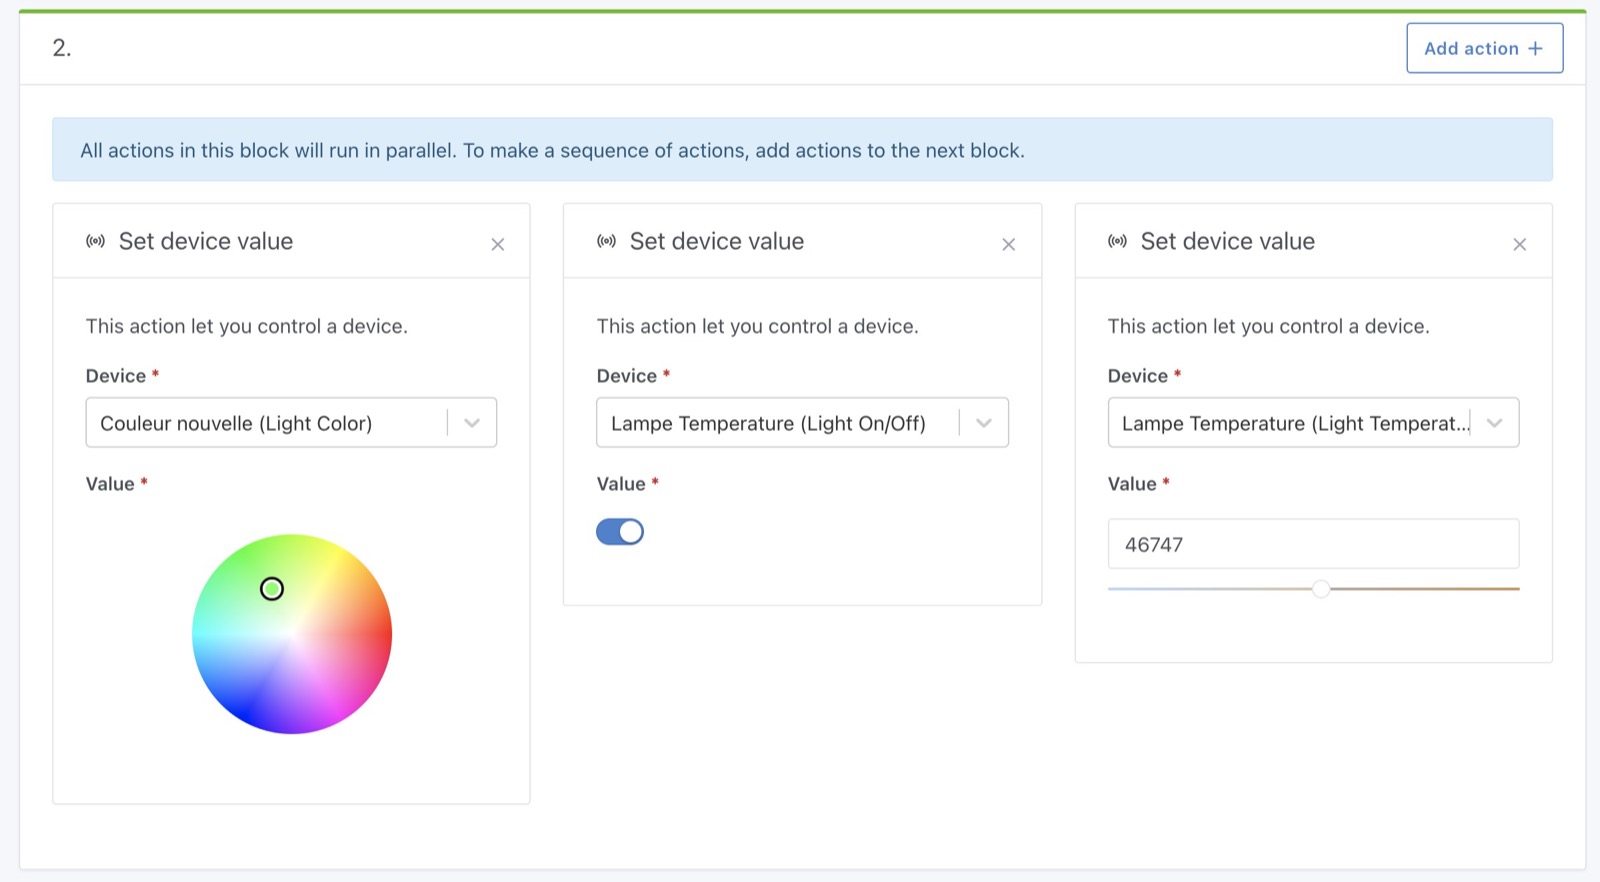
New "Set device value" action in scenes

It's now possible to control any device in a scene:

  • You can control the color of a lamp
  • Control the temperature of a lamp
  • Control any multilevel value

Control device scene Gladys Assistant

It's very powerful, and I hope you'll like it!

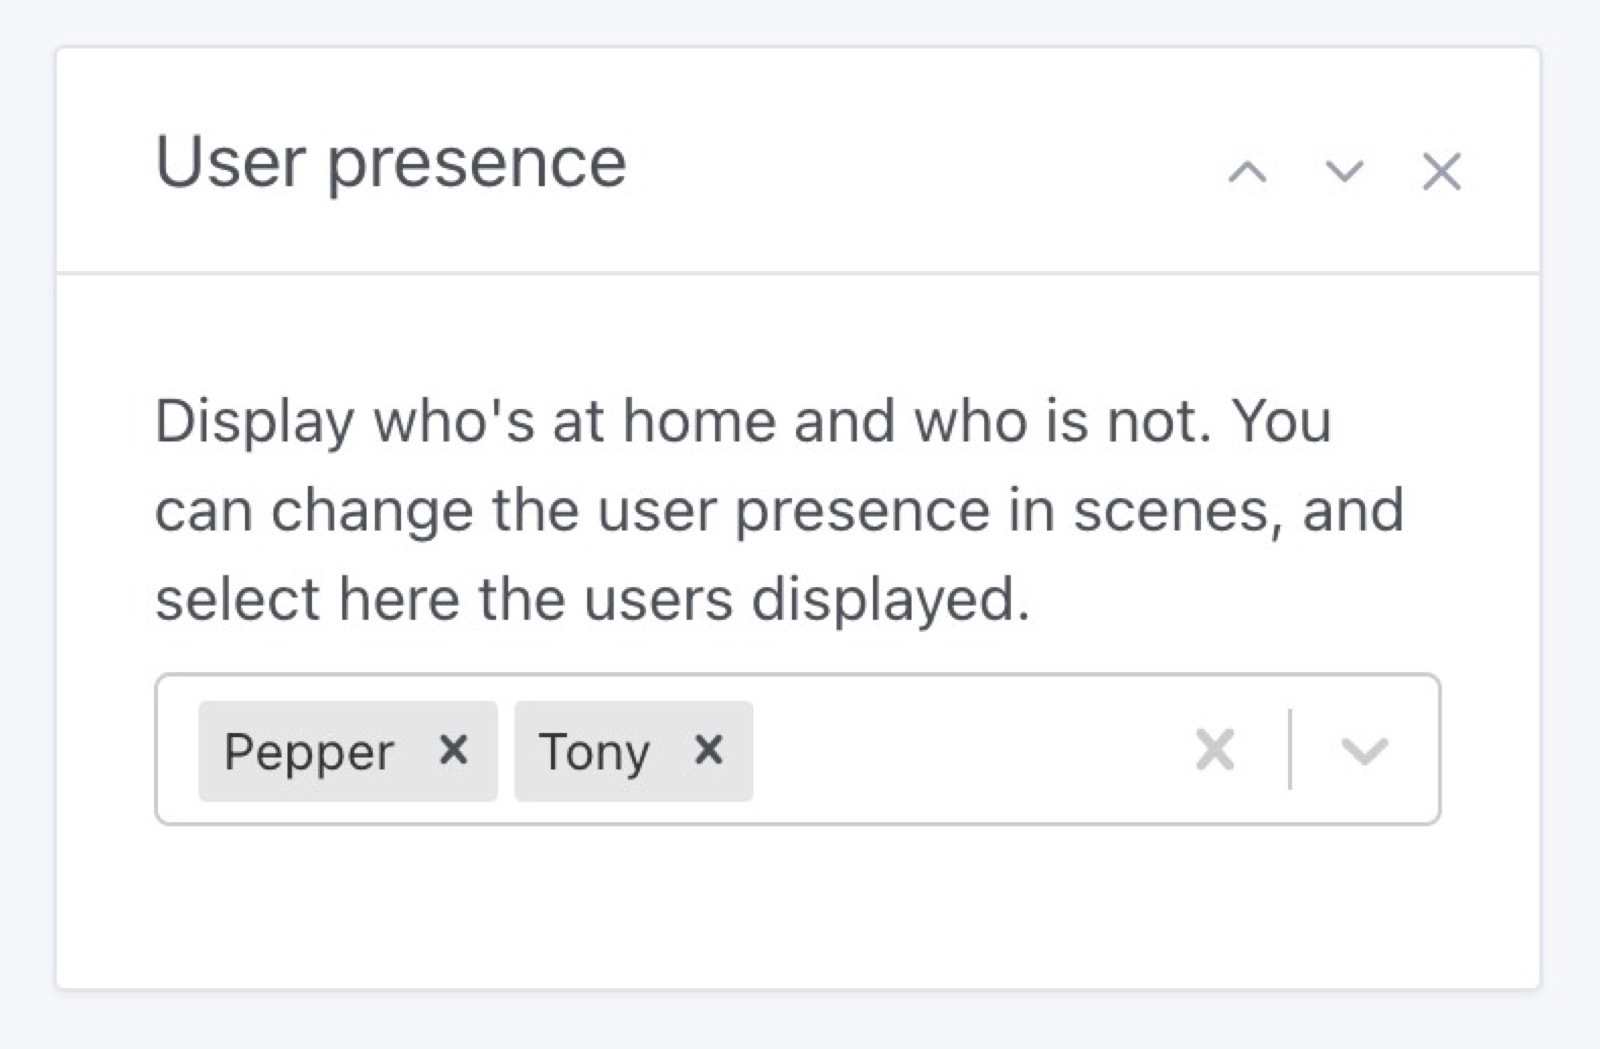
Enhancing the user at home dashboard box

Small change, it's now possible to select which user to display in the "user at home" dashboard box.

Select users in user at home box Gladys Assistant

Lots of performance improvements

As the forum was very quiet this summer, I took the time to work on some more long-term tasks.

I migrated preact-cli (the tool we use to build Gladys frontend) to their new release 3.x. It was not easy, but definitely worth it, as it reduced by a lot the size of the javascript bundle.

I did quite some work on removing some heavy library that were not necessarely needed in the frontend, to make it lighter and faster!

I hope you'll enjoy the new speed :)

A first alpha for the Google Home integration in Gladys Plus

I've been working on integrating Gladys Plus with Google Home, the goal is to be able to control your devices:

  • In the Google Home app
  • Vocally with a Google Home device
  • With Google Assistant on your phone

Here a short demo of the integration on Twitter.

If you are interested in testing this, please send me a message on the forum!

New Zigbee2mqtt devices compatible

A few new Zigbee2mqtt devices were added:

  • TuYa TS0601 Air Quality Sensor and CO2 feature #1247
  • Philips Hue 929002241201 #1259
  • Light color feature #1203

Fix Bluetooth bug

There was a recurrent bug where Gladys was not be able to connect to the Bluetooth driver as the driver was not "ready".

This is now fixed in Gladys Assistant v4.5.

Read more on this commit: Bluetooth check state before scan + stop presence scanner #1194

How to upgrade?

If you installed Gladys with the official Raspberry Pi OS image, your instance will update automatically in the coming hours. It can take up to 24 hours, don't panic.

If you installed Gladys with Docker, make sure you are using Watchtower. See the documentation.

With Watchtower, Gladys will update automatically.

Thanks to contributors

Thanks to everyone who contributed to this release and gave their feedback on the forum!

If you want to talk about this release, you're all welcom on the forum !

· 2 min read
Pierre-Gilles Leymarie

Hi all,

Today we are releasing Gladys Assistant v4.4, a brand new version that is finally making the map view useful in Gladys !

What's new in Gladys Assistant 4.4?

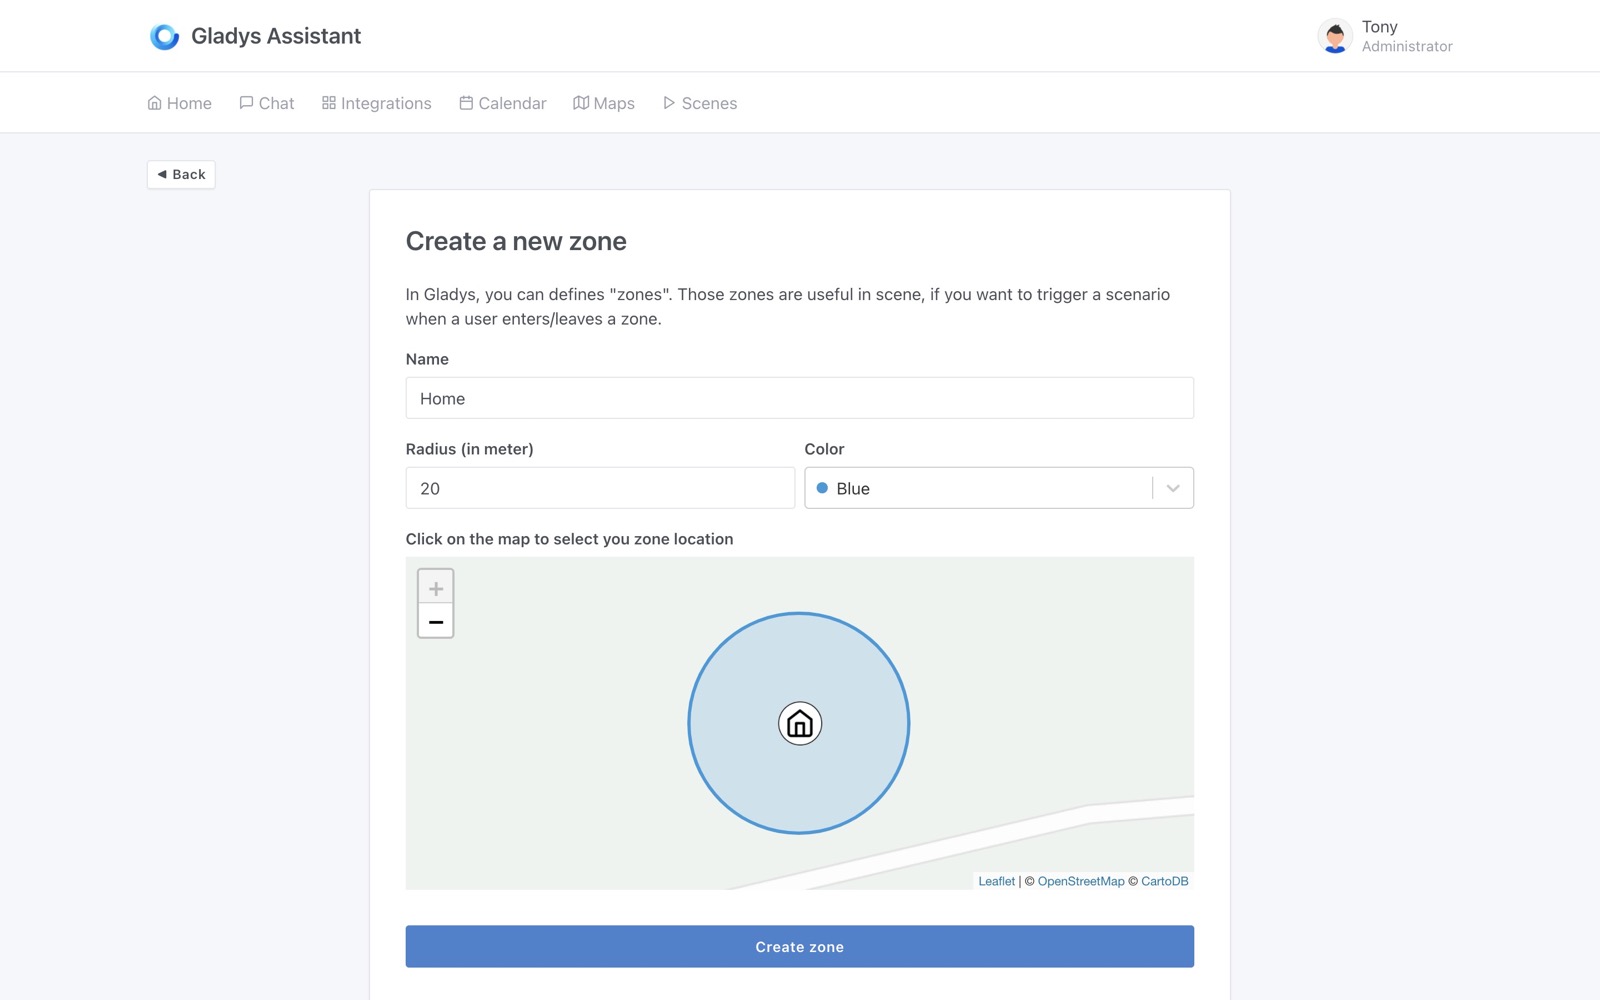
Create zones in the map view

On the map, you can now create zones:

  • For your home
  • Your work
  • The school
  • Literally anywhere on earth!

Create a zone

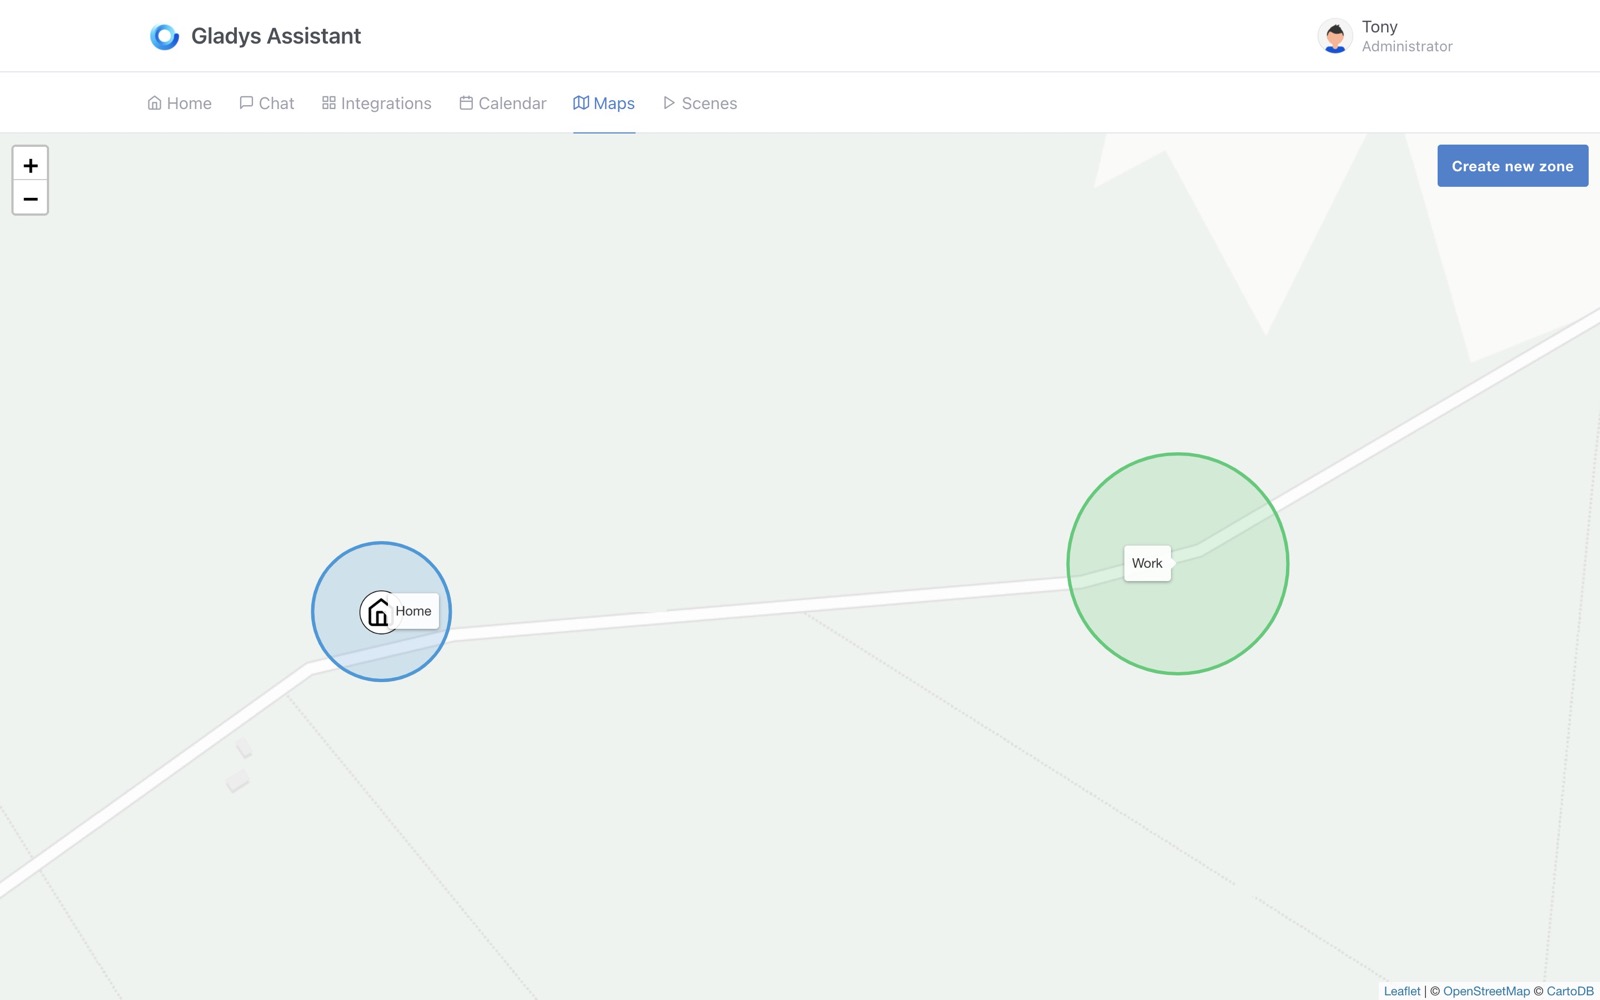
You should see your created zone on the map

Map

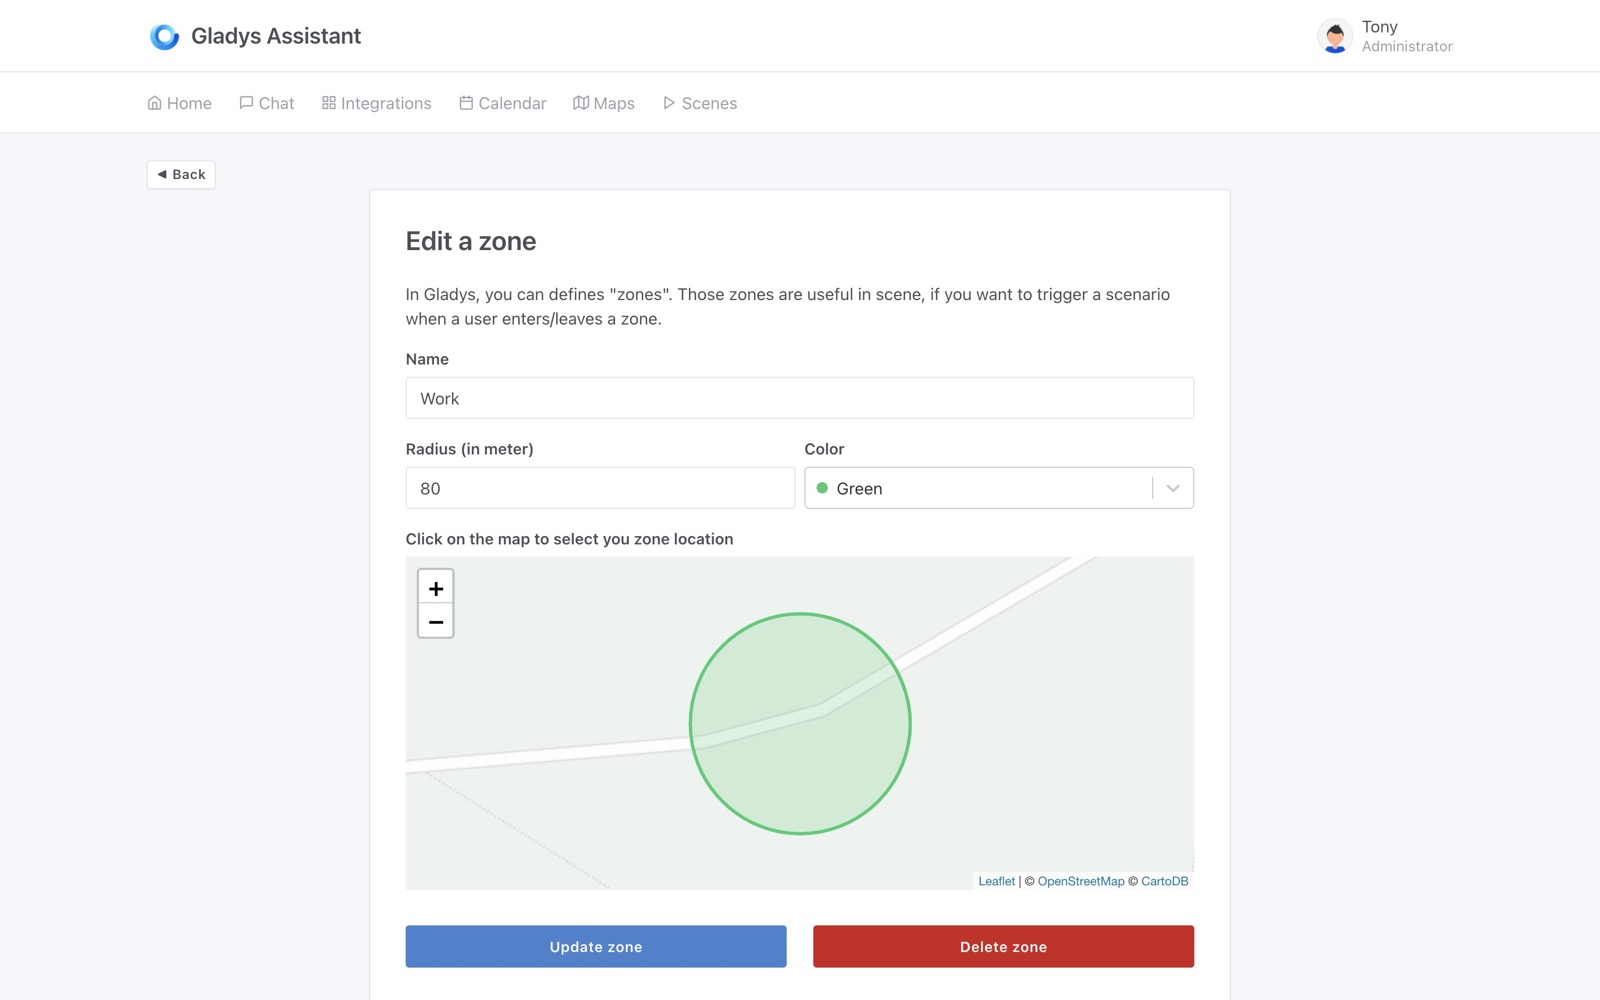
You can of course edit those zones:

Edit a zone

Start a scene when a user enters/leaves a zone

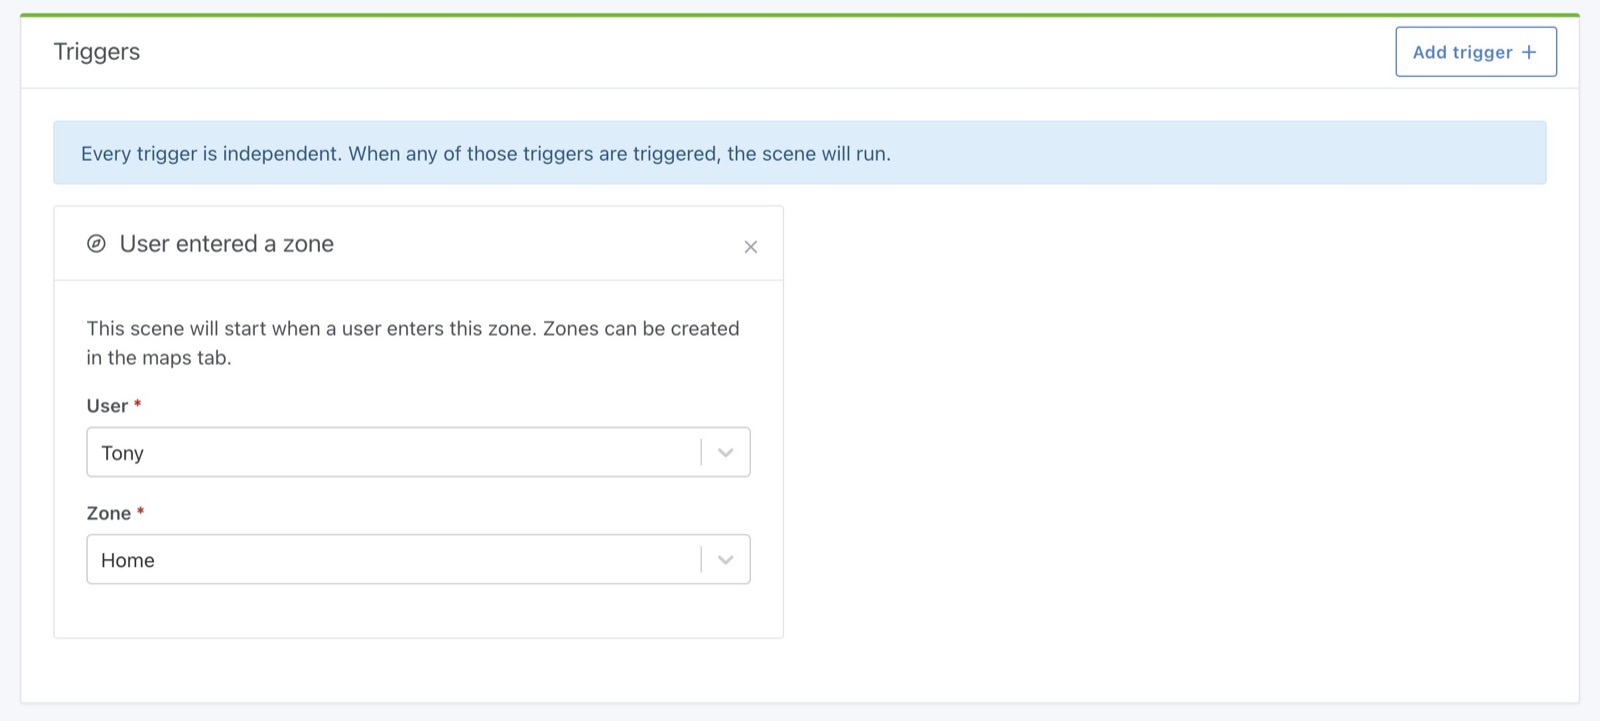
Now, using the zones you previously created, you can now create a zone that will be trigger when a user enters the zone:

User entered zone in scene

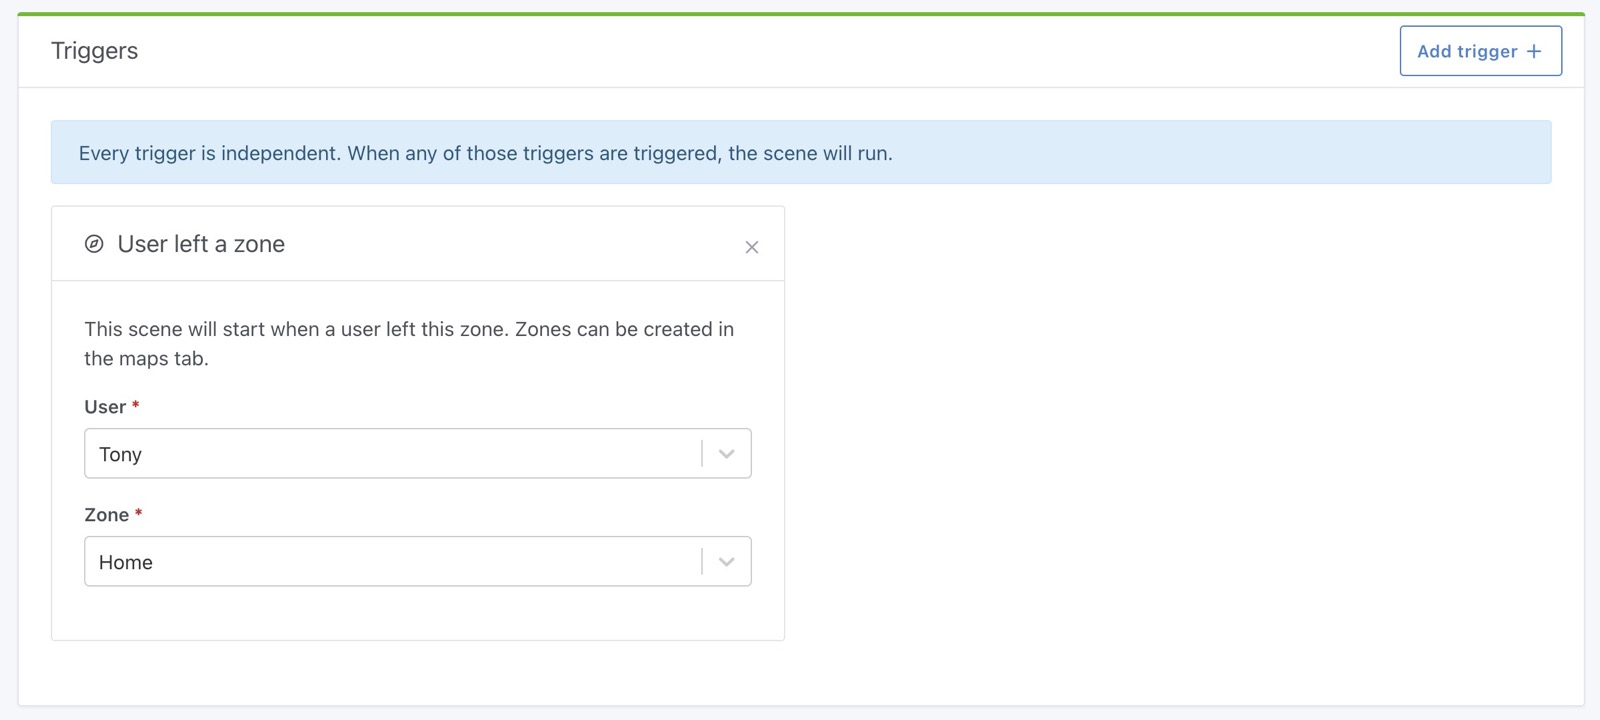
or when the user leaves the zone:

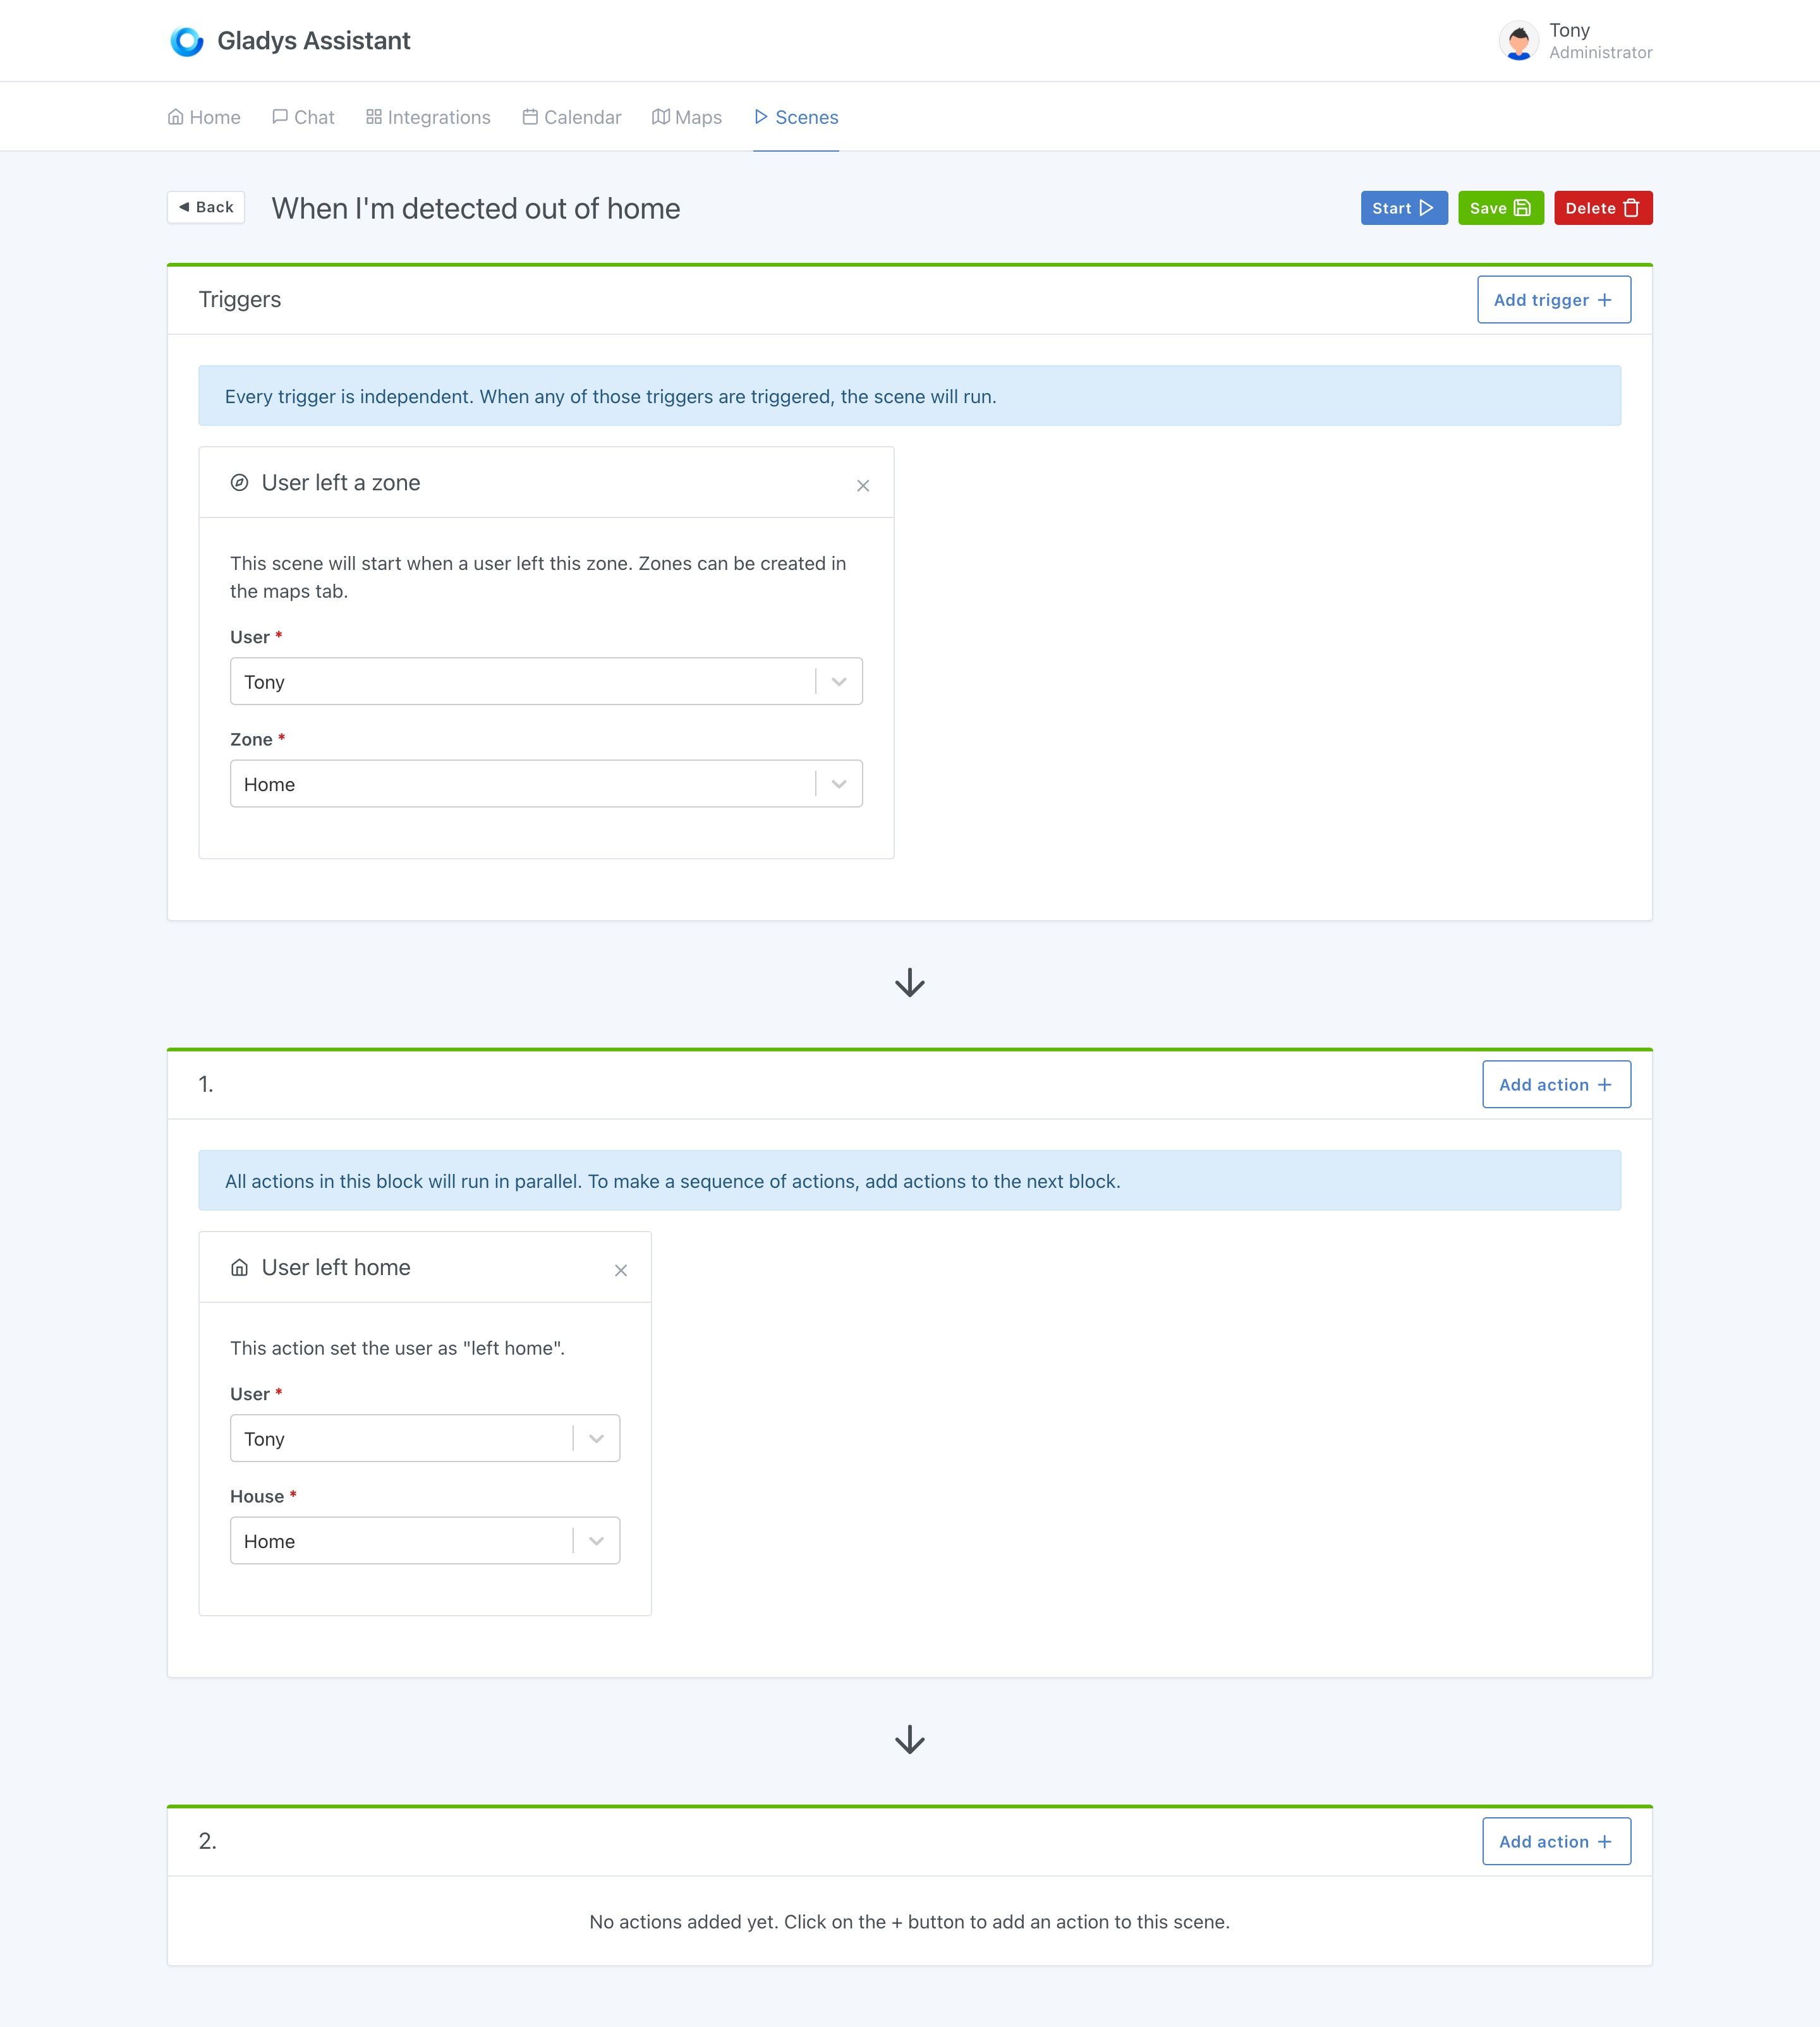
User left zone in scene

An example: set your user as "at home" or "left home"

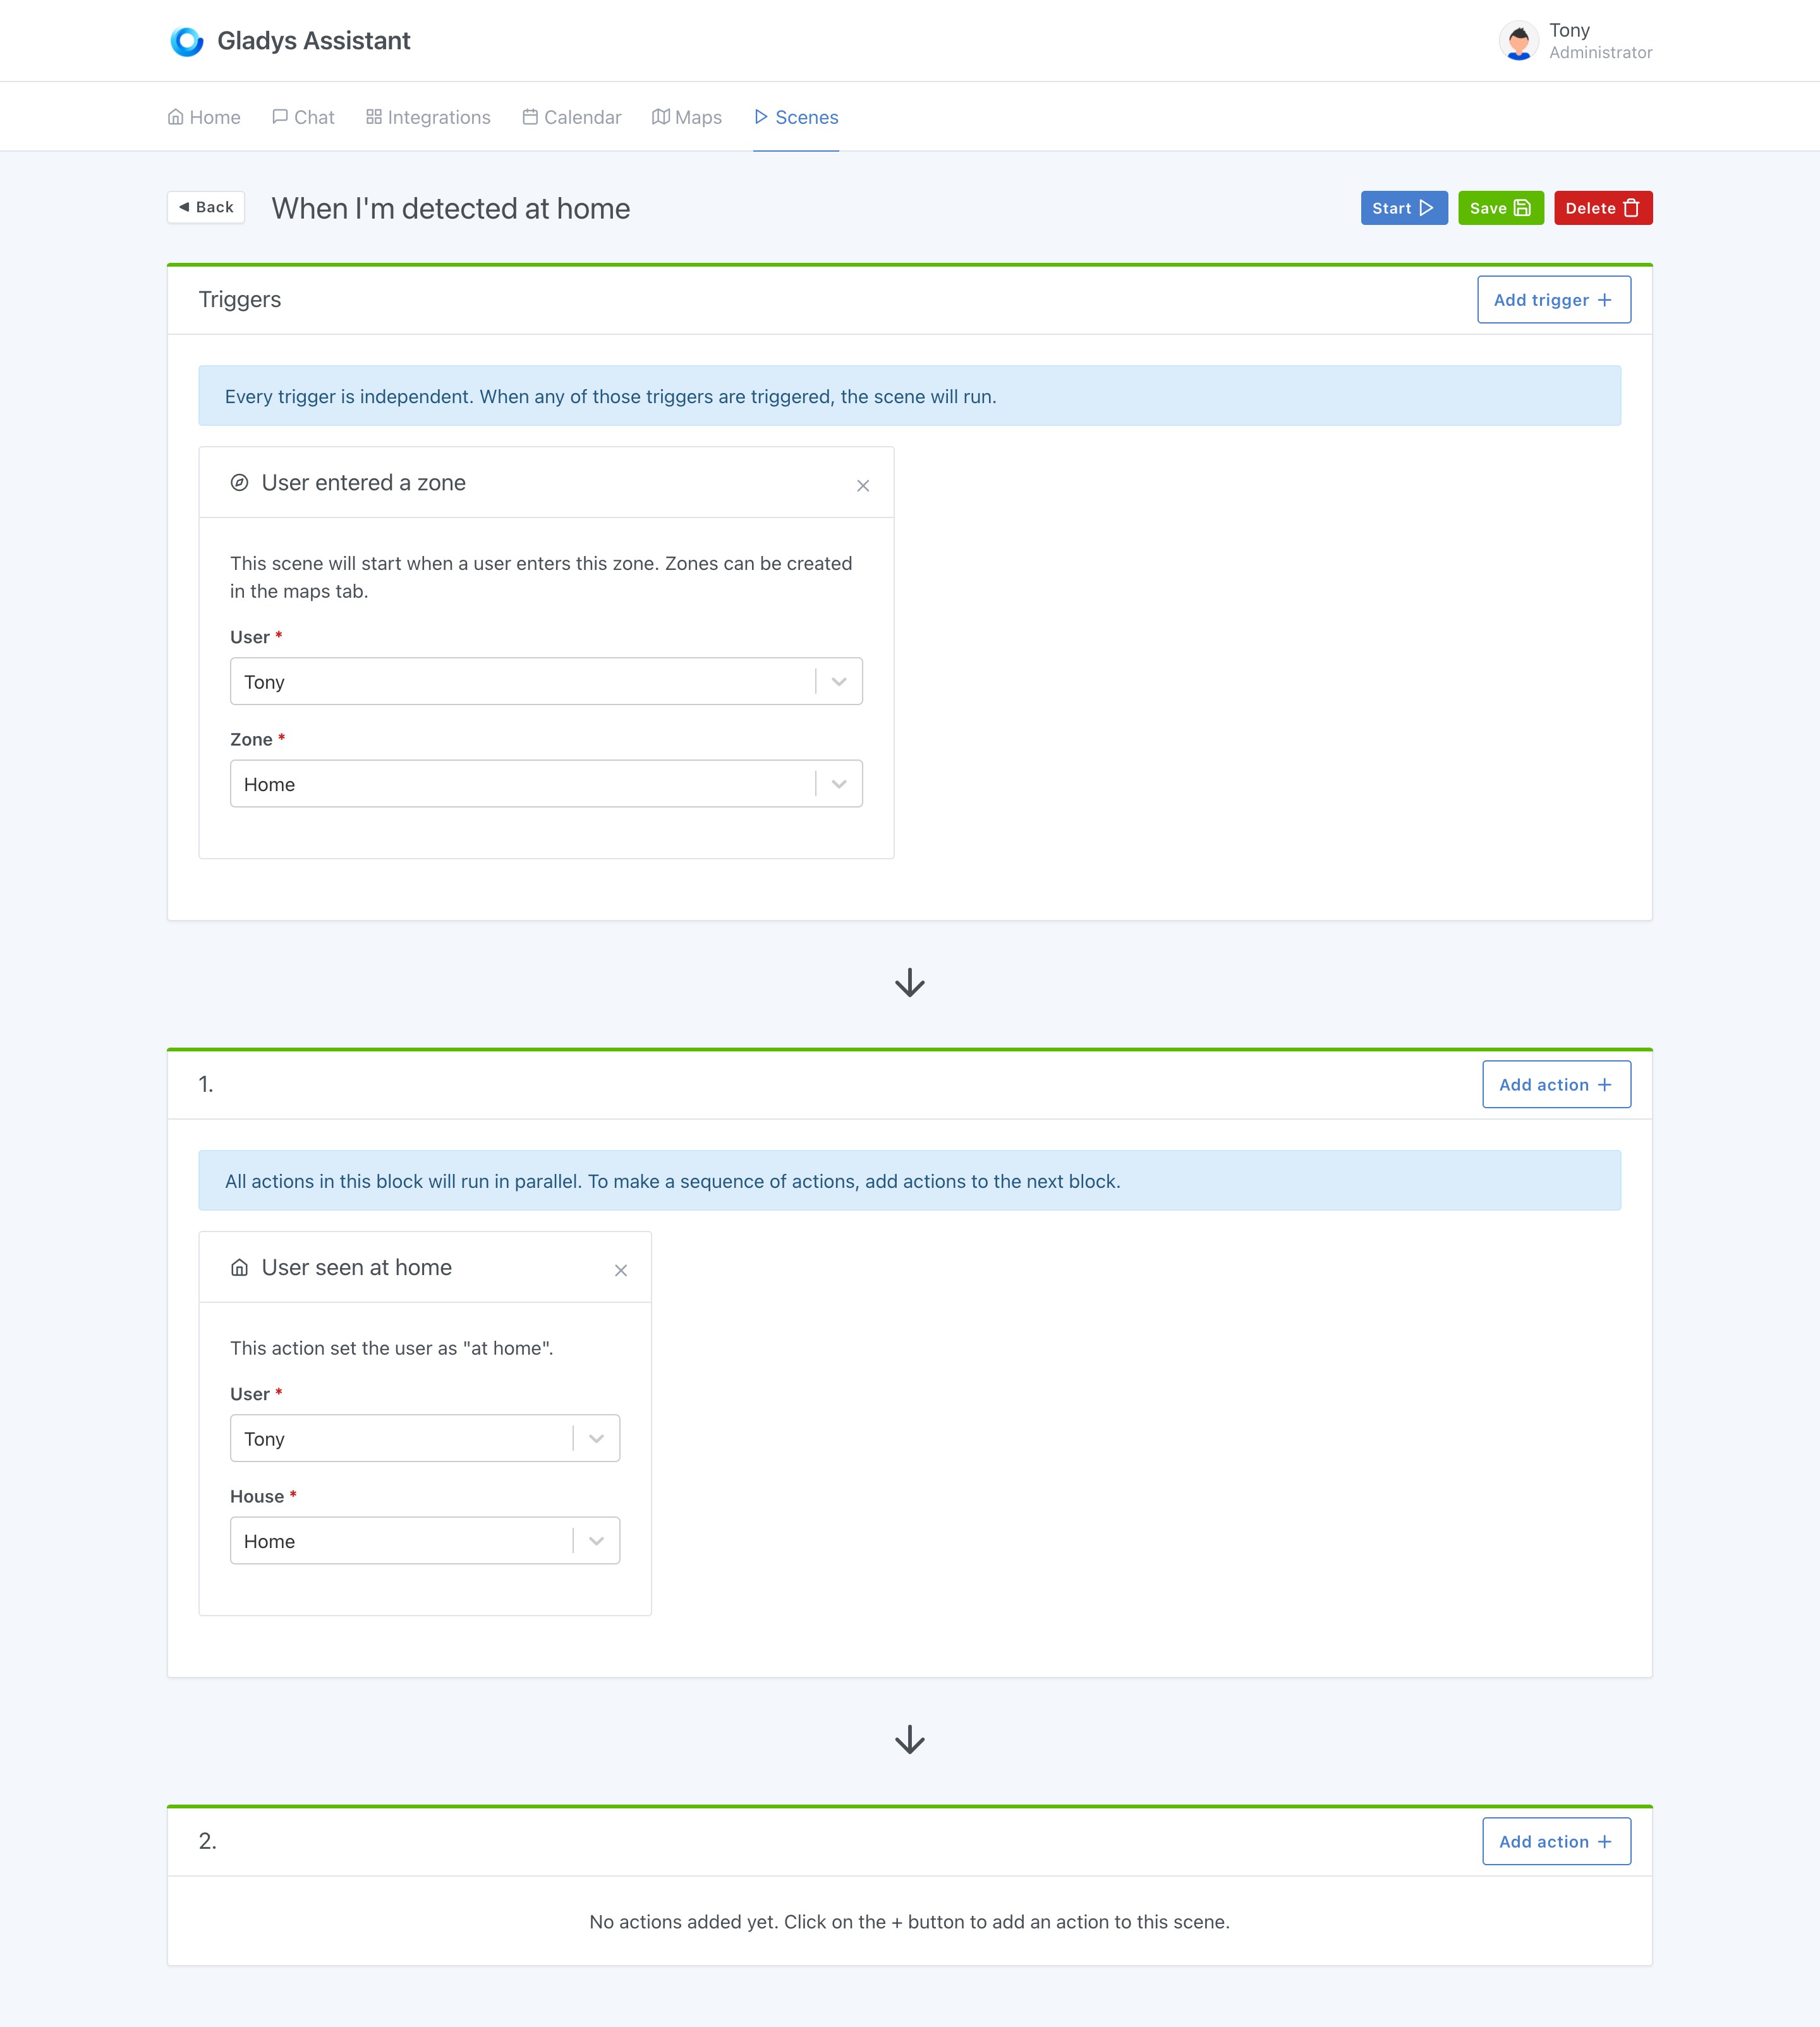
Imagine you want to set your user as "at home" when you enters a zone, and "left home" when you leaves a zone.

You can do that by creating two scenes, at home:

At home

And left home:

Left home

House empty/not empty condition in scene

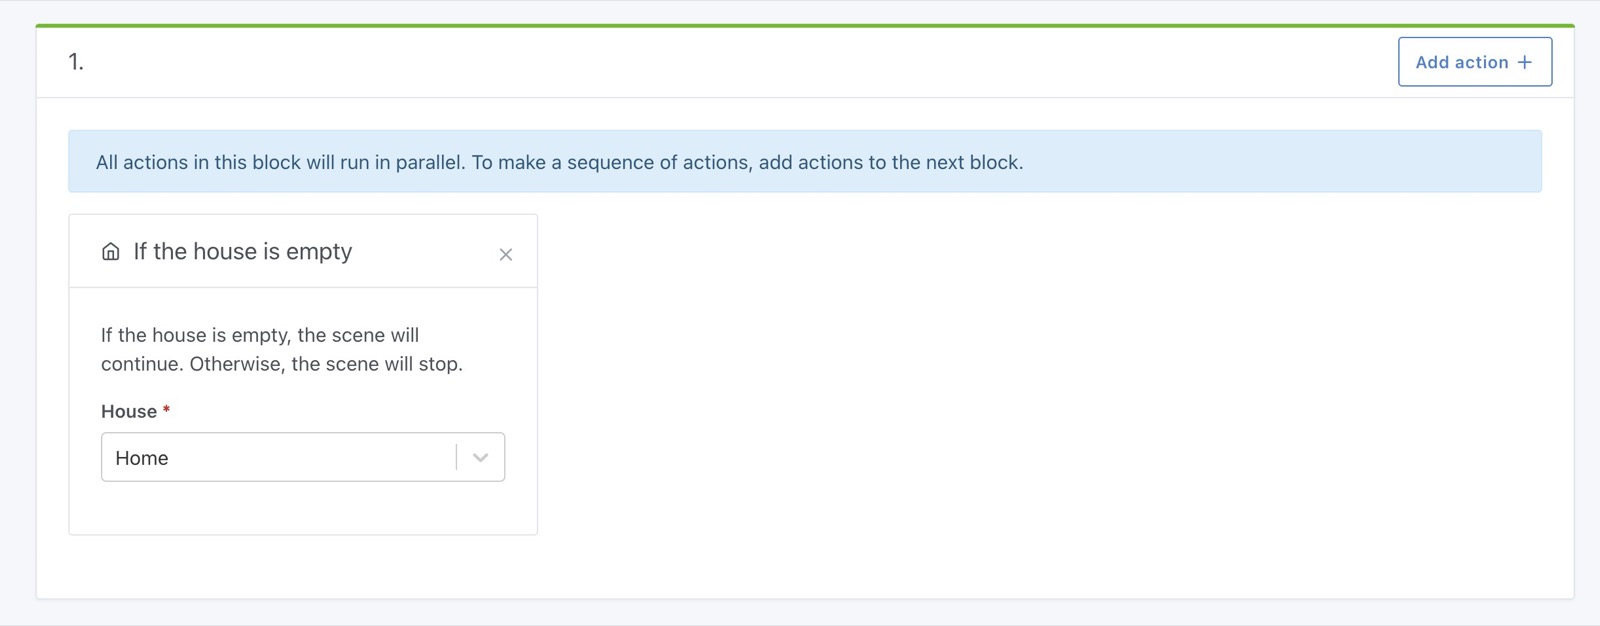
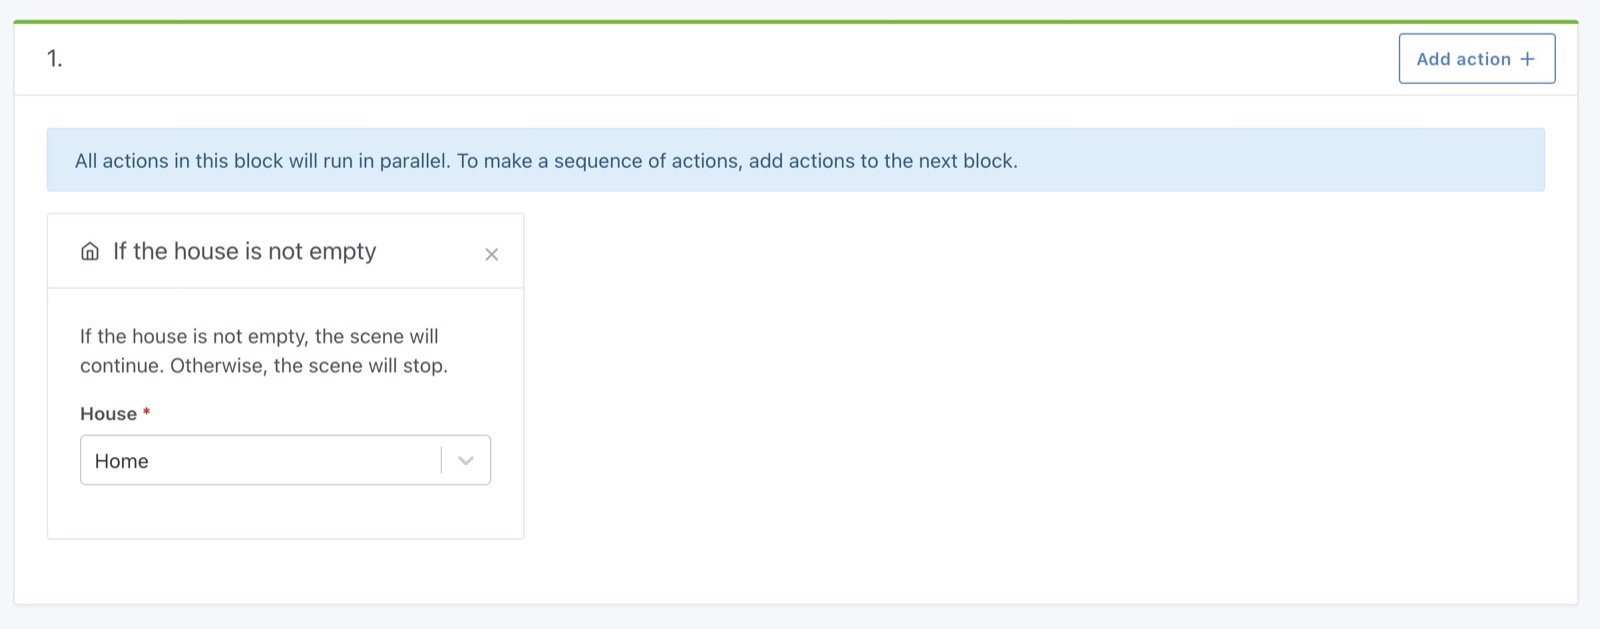
It was already possible to create a scene that triggers when a house is empty/not empty, but it was not possible to add a condition in a scene to continue only if the house is empty/not empty.

It's now possible!

House empty

House not empty

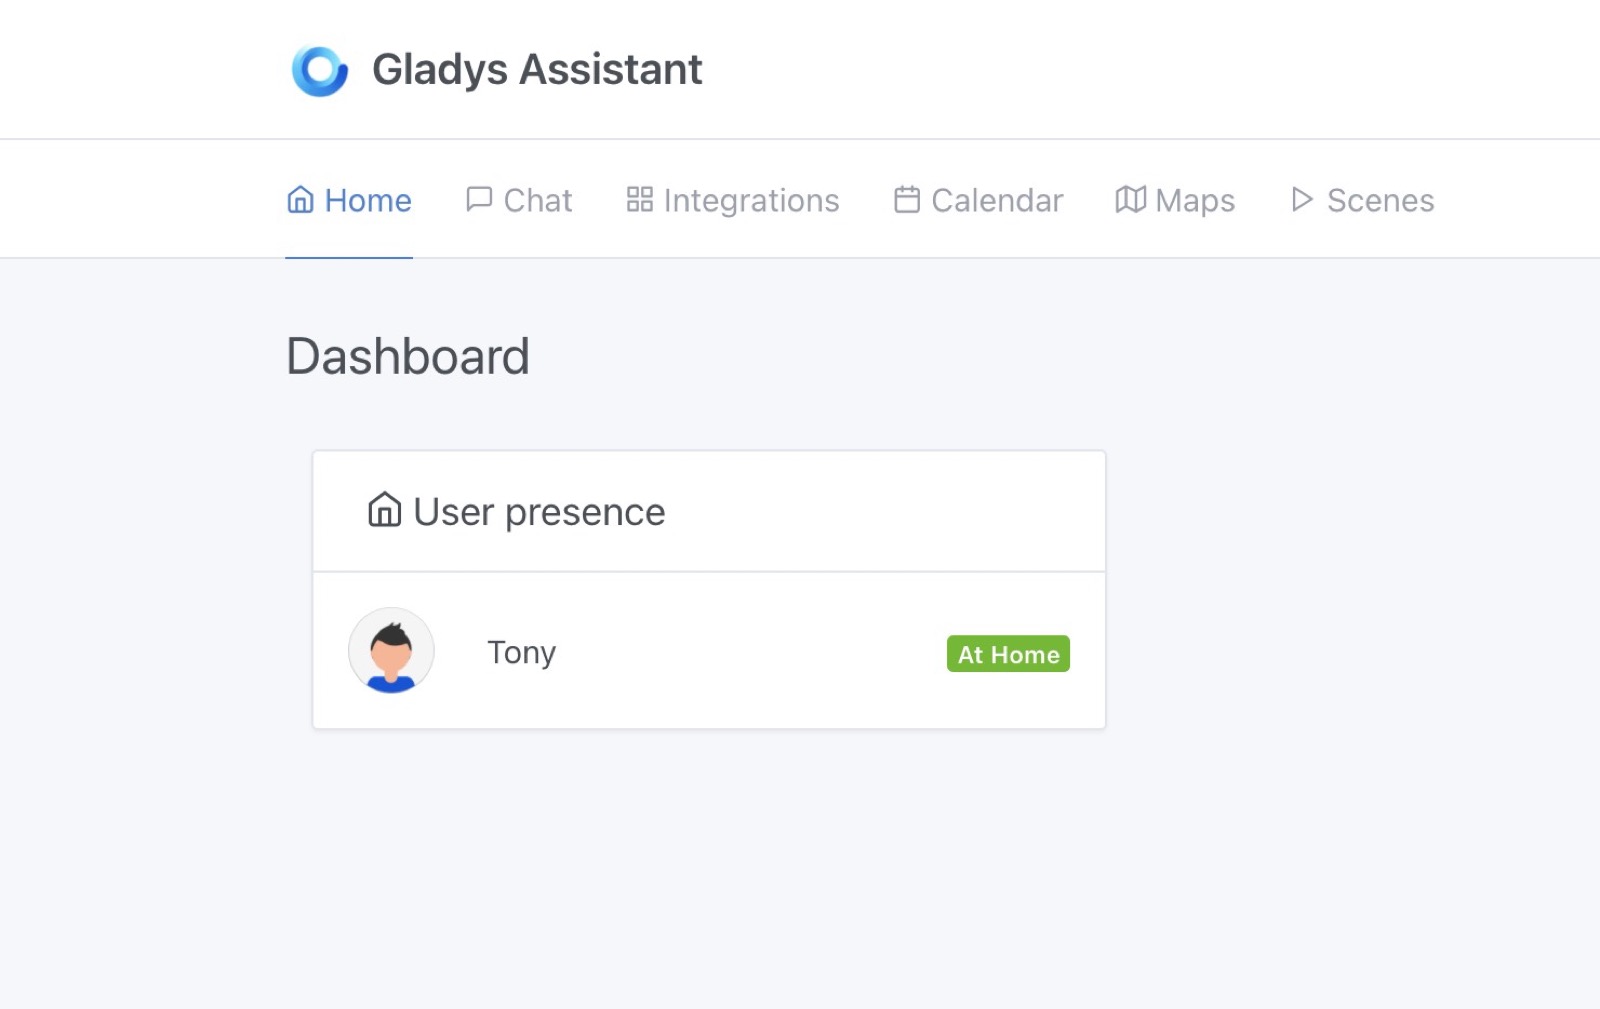
With this scene, you can add the presence card on the dashboard:

User presence dashboard

Bugfixes

We fixed a few bugfixes in this release:

  • Calling a scene from a scene should duplicate the scope object to avoid context pollution #1205
  • Fix log in scene continue-only-if action #1201

How to upgrade?

If you installed Gladys with the official Raspberry Pi OS image, your instance will update automatically in the coming hours. It can take up to 24 hours, don't panic.

If you installed Gladys with Docker, make sure you are using Watchtower. See the documentation.

With Watchtower, Gladys will update automatically.

Thanks to contributors

Thanks to everyone who contributed to this release and gave their feedback on the forum!

If you want to talk about this release, you're all welcom on the forum !

· 5 min read
Pierre-Gilles Leymarie

Hi all,

Today is the release of Gladys Assistant v4.3, a new update that puts the scenes in the spotlight!

Scenes are the backbone of home automation.

Having a connected home is not just to control it remotely: it is also to automate what is done regularly, to bring a share of magic to our home and make our daily lives easier.

What's new in version 4.3

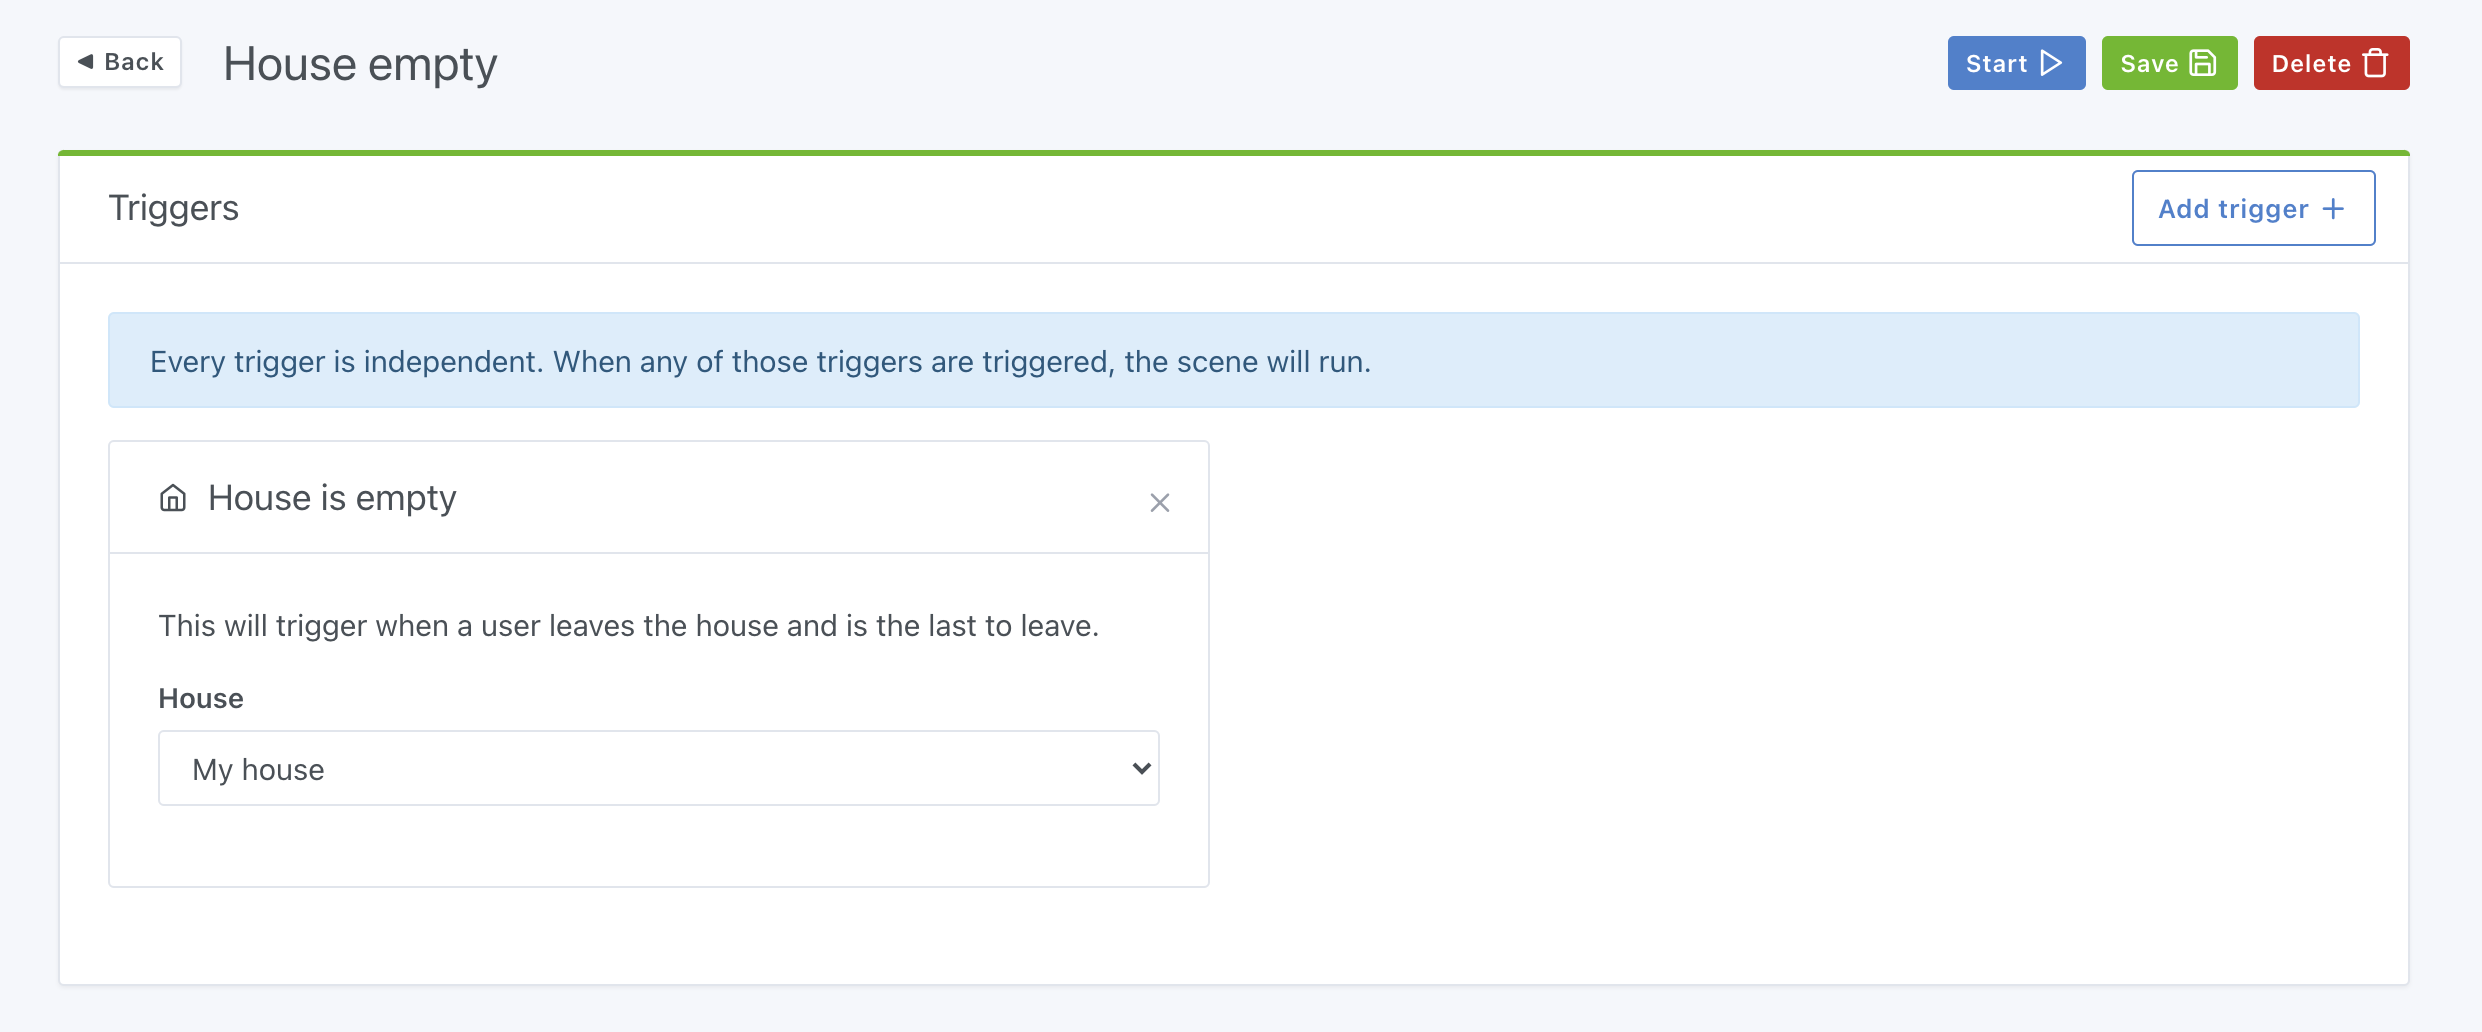
A new trigger "When the house is empty"

Want to be sure everything is off when the last person leaves the house?

It is now possible to make a scene that will be triggered when the last one leaves the house.

House is empty Gladys Assistant

In terms of presense detection, the feature is present from Gladys Assistant v4.1, and can work in different ways:

  • Via bluetooth: There are Bluetooth key fobs like the Nut which are very easily detectable by Gladys. The principle is simple: when you leave your home, Gladys will no longer "see" the bluetooth keychain and will mark you as absent, and when you come back, Gladys will detect the keychain and mark you as present.
  • In the scenes: it is possible to create a scene which is triggered after a change of state of a sensor for example, which will mark you as present/absent from the house. So you can do more or less what you want to mark yourself as present/absent at home.

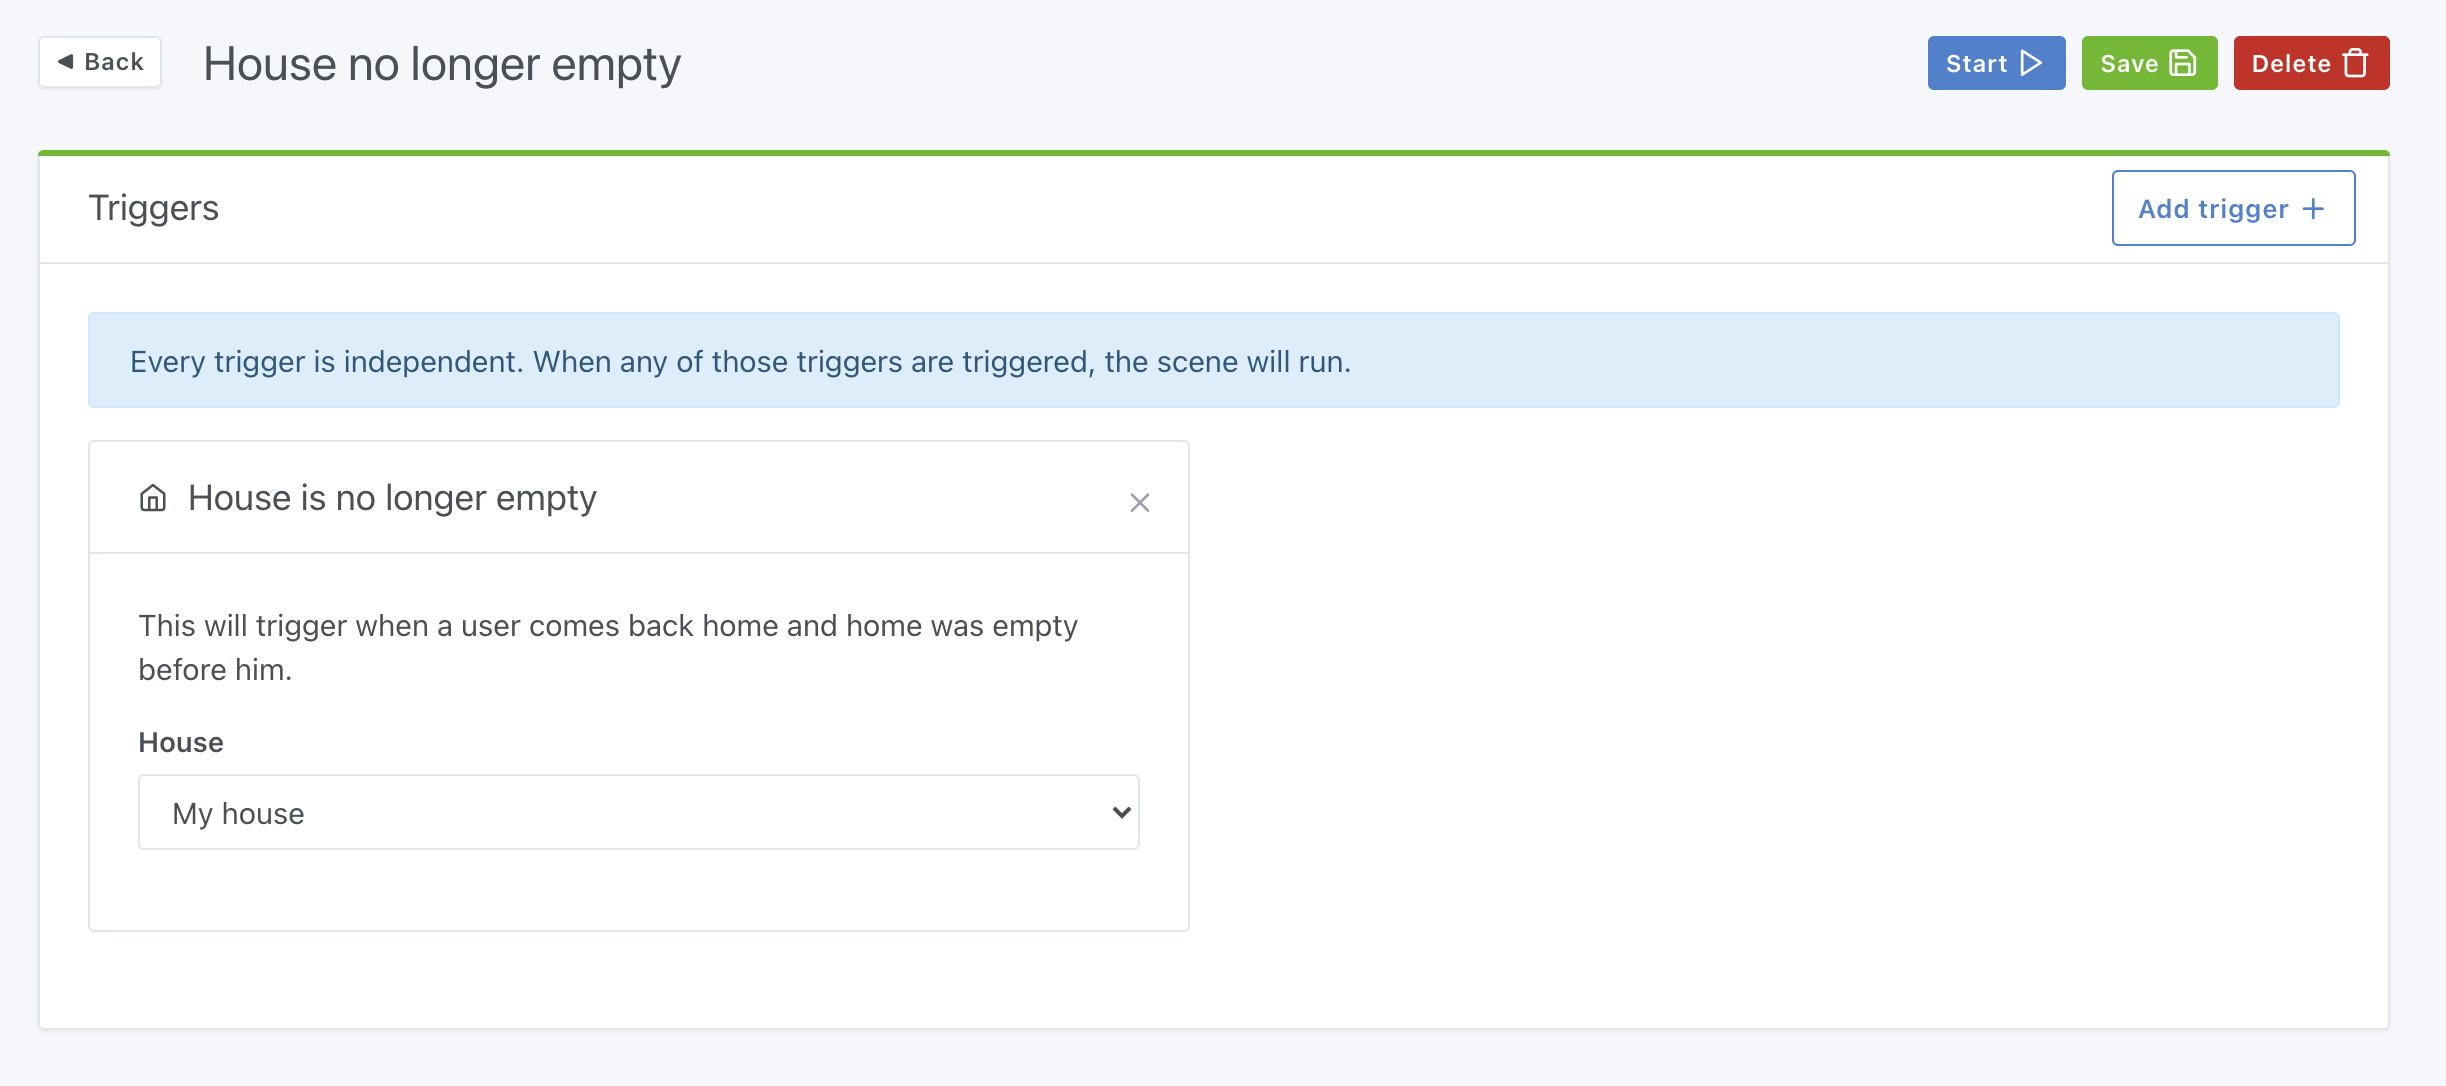
Its opposite, "When the house is no longer empty"

Rather, you want to do another scene that will turn on everything when someone comes home and the house was empty before them.

This is possible with the trigger "when the house is no longer empty":

House no longer empty Gladys Assistant

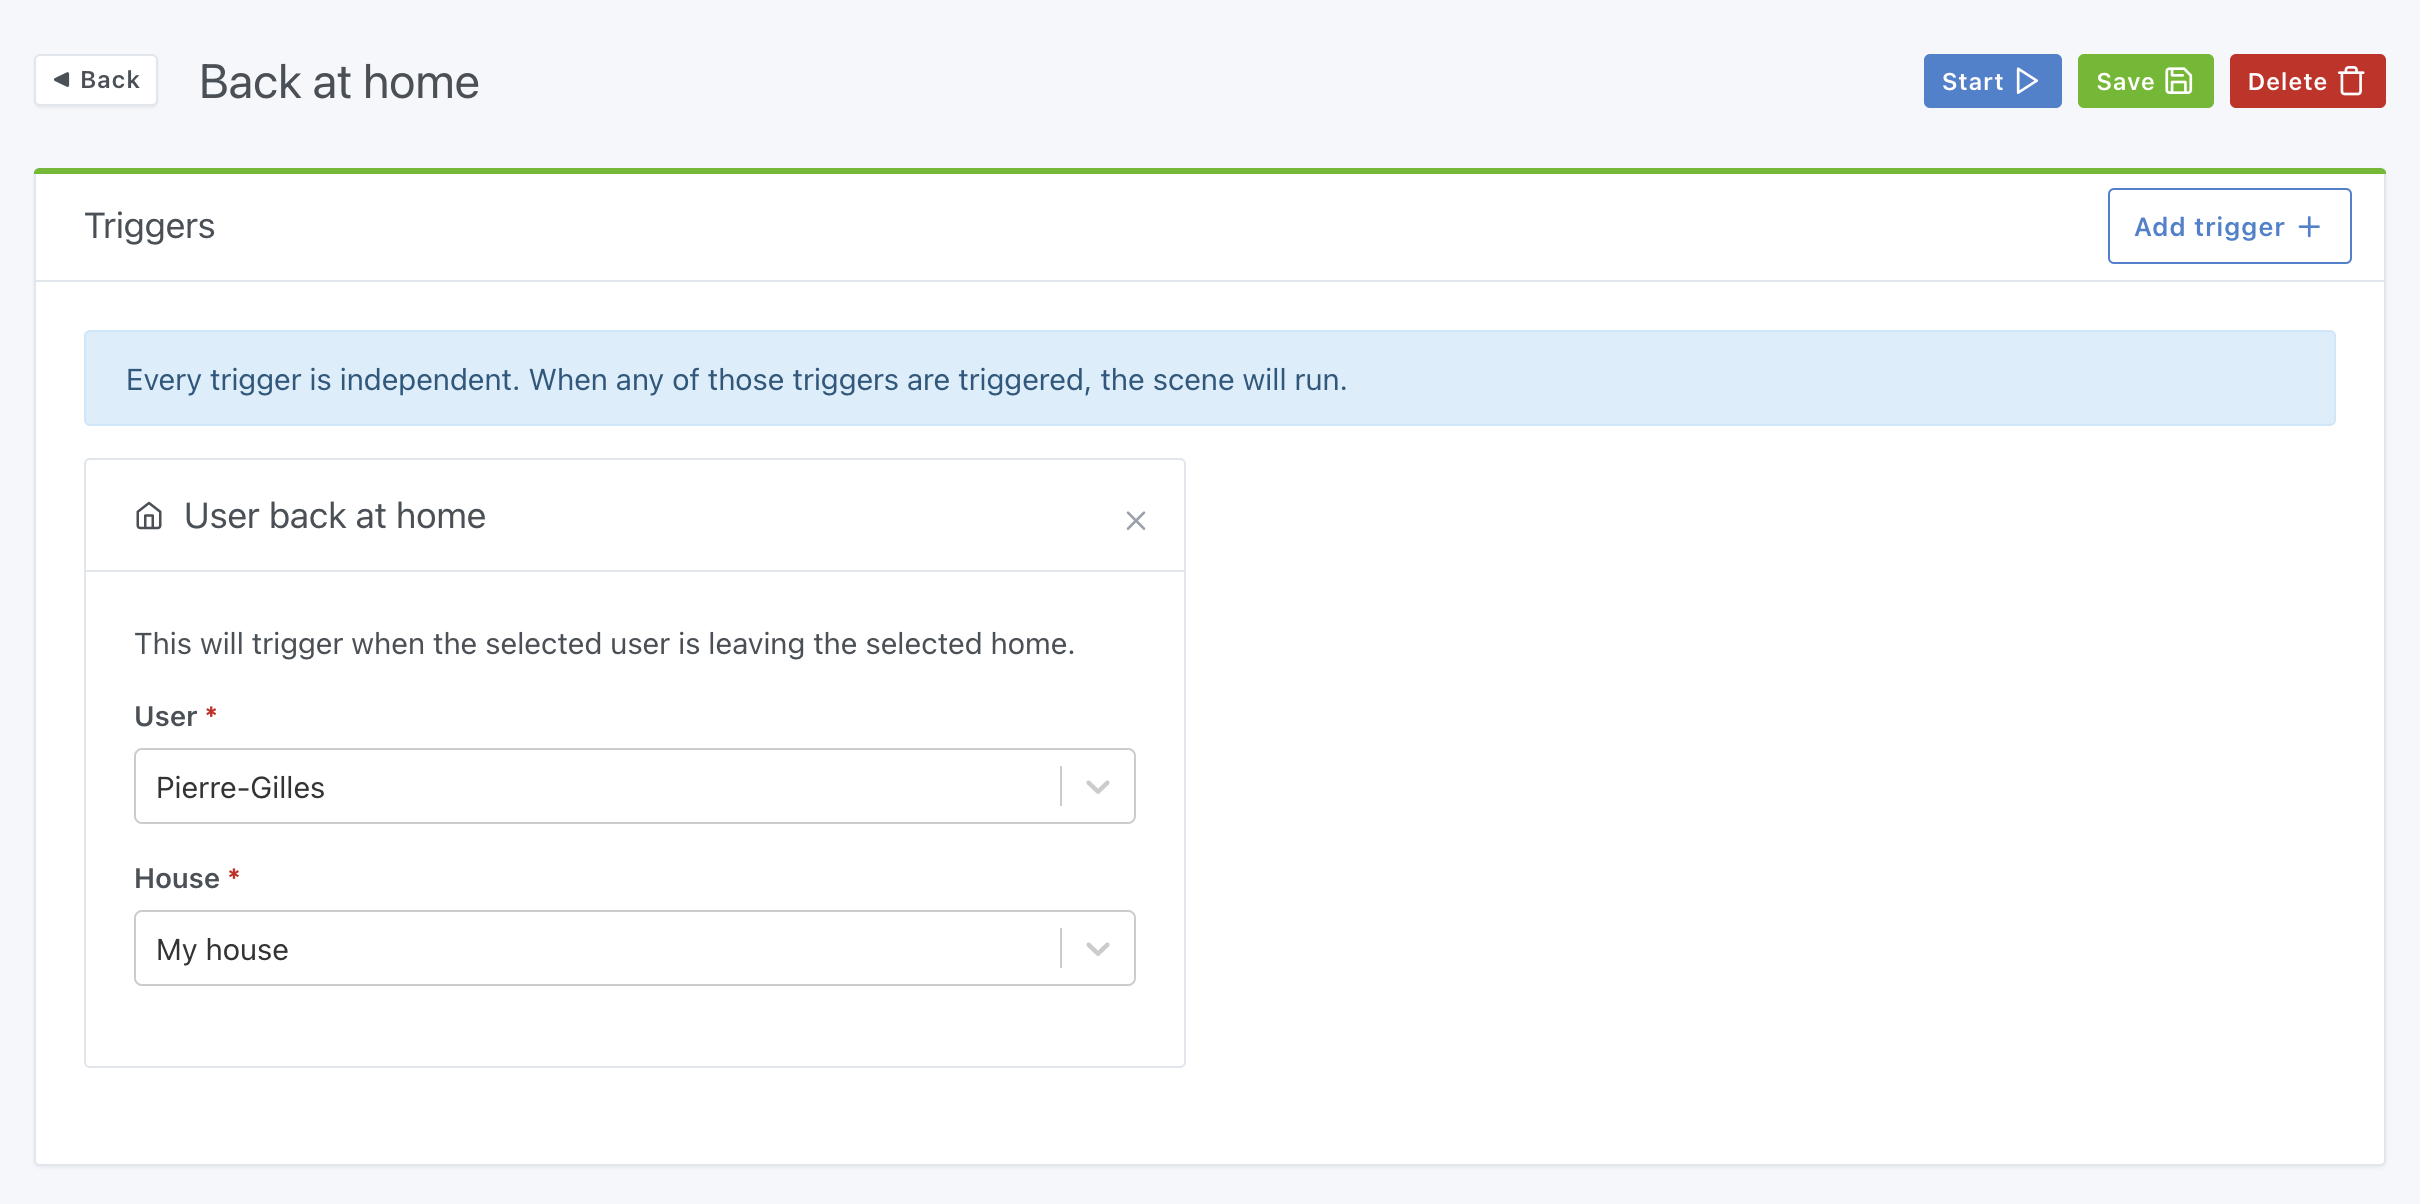
More precise, the "back home" trigger

Want to trigger a scene only when a specific user comes home?

There is now a "Back home" trigger that will only fire when the selected user returns home.

Back at home Gladys Assistant

Convenient to make a specific scene for each person in the house.

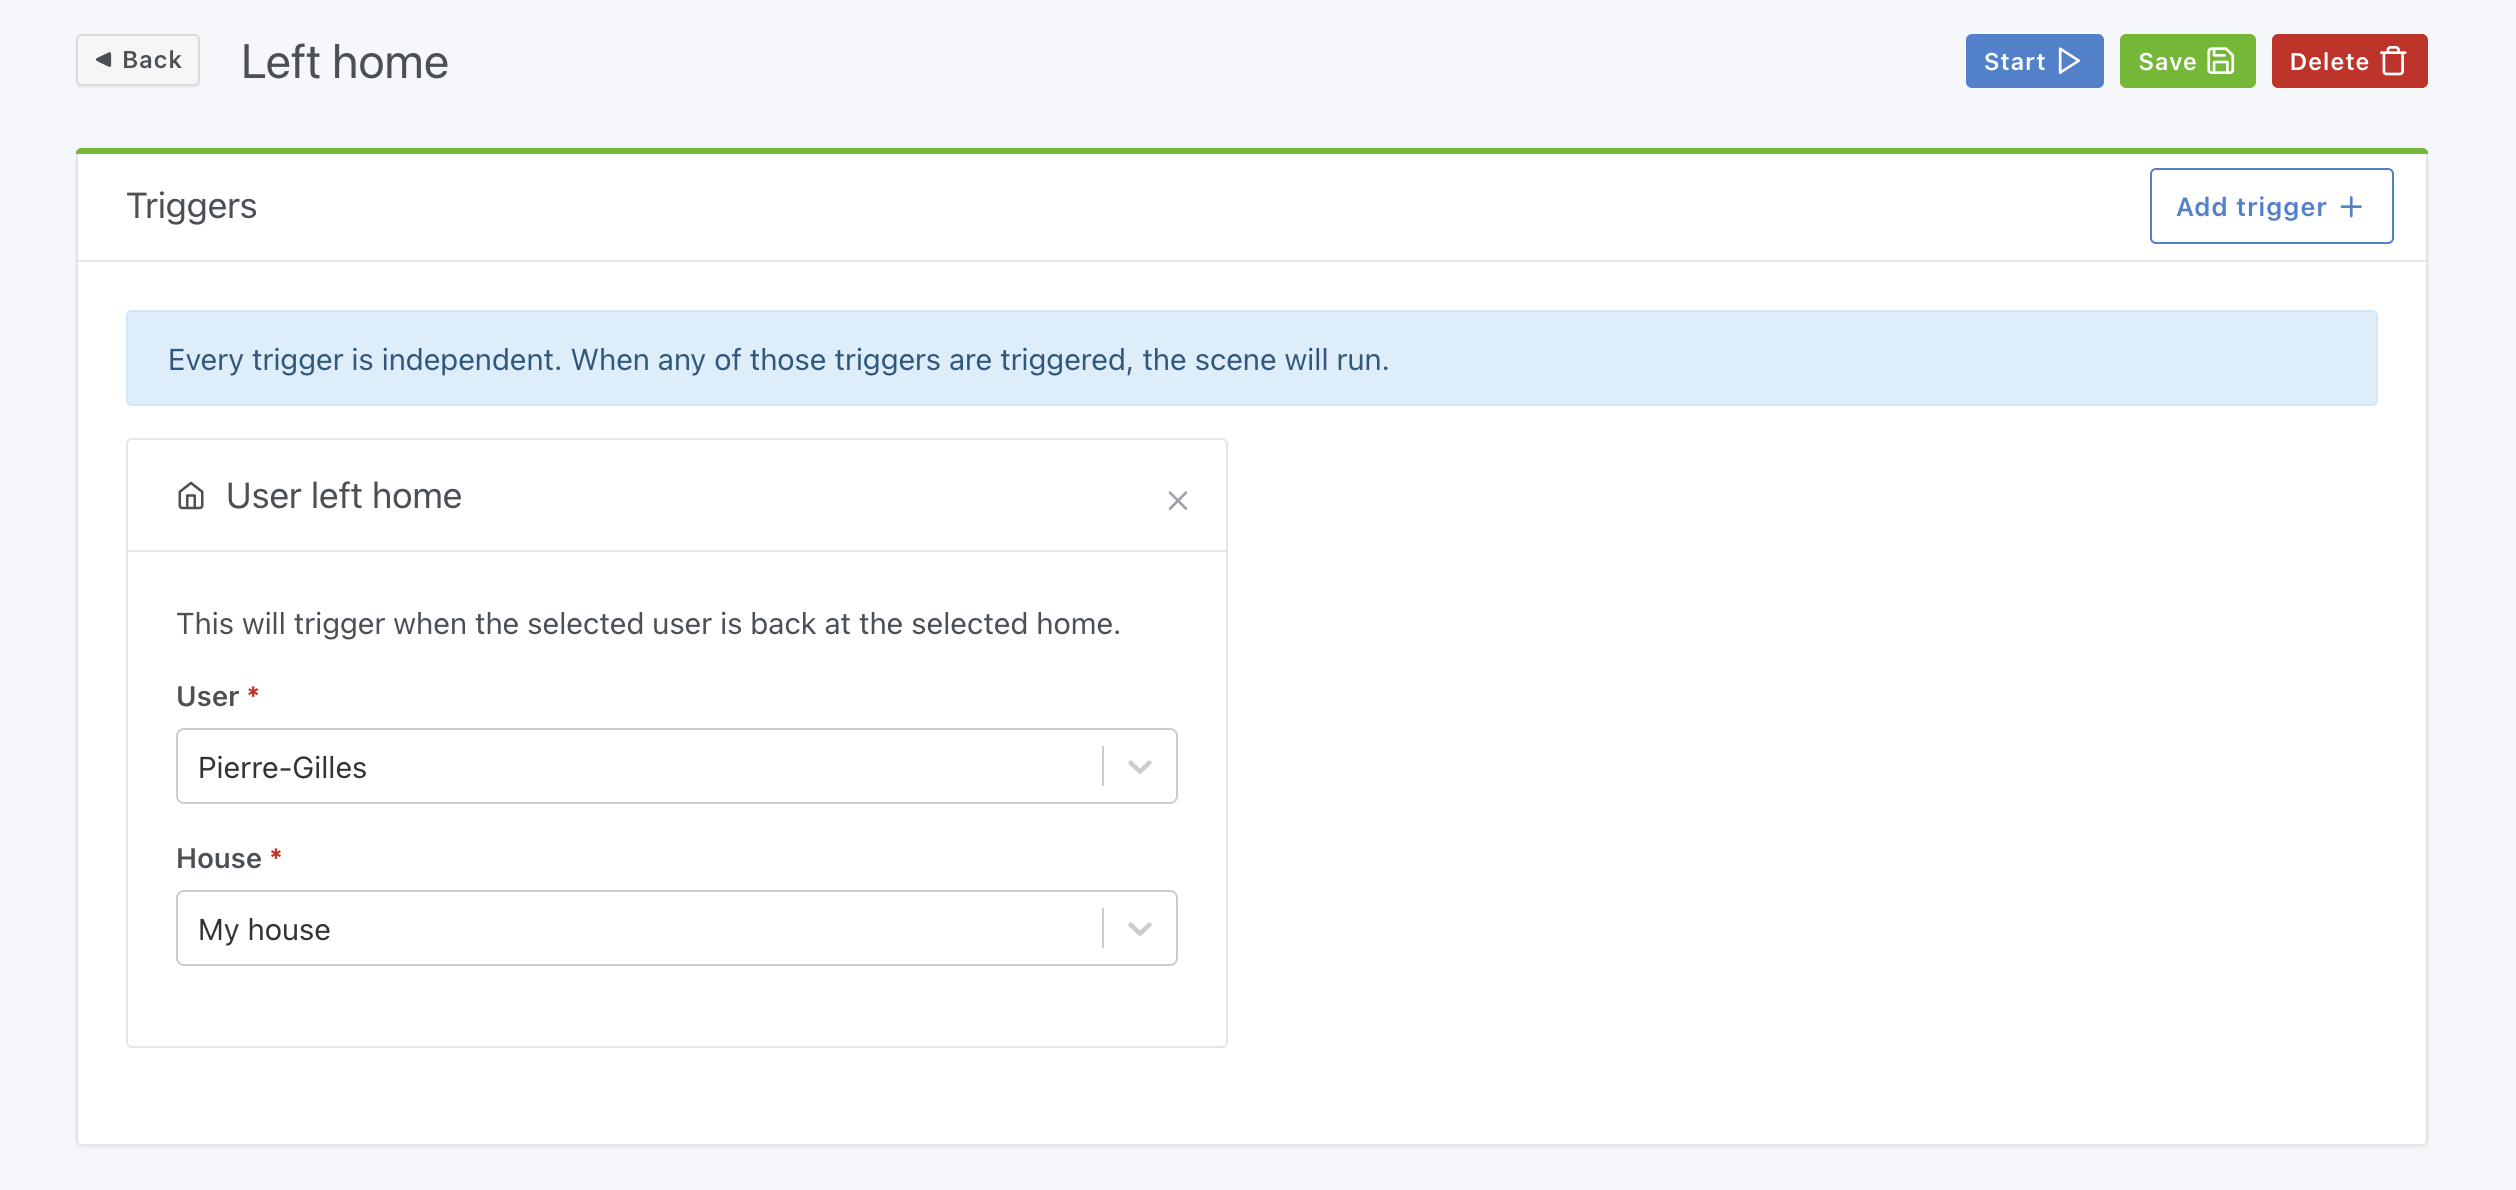
And its opposite, "Left home"

Same concept but for the departure of the house.

Left home Gladys Assistant

Time condition

While it is possible to make a scene that is triggered with a certain recurrence (with scheduled scenes), it was not possible until then to add a time-based condition in the scene.

For example, let's say you want to make a scene:

  • "When the living room temperature is < 20°C"
  • AND "it is between 9h and 22h"
  • THEN send me a message "The temperature is too low"

It is possible with the time-based condition!

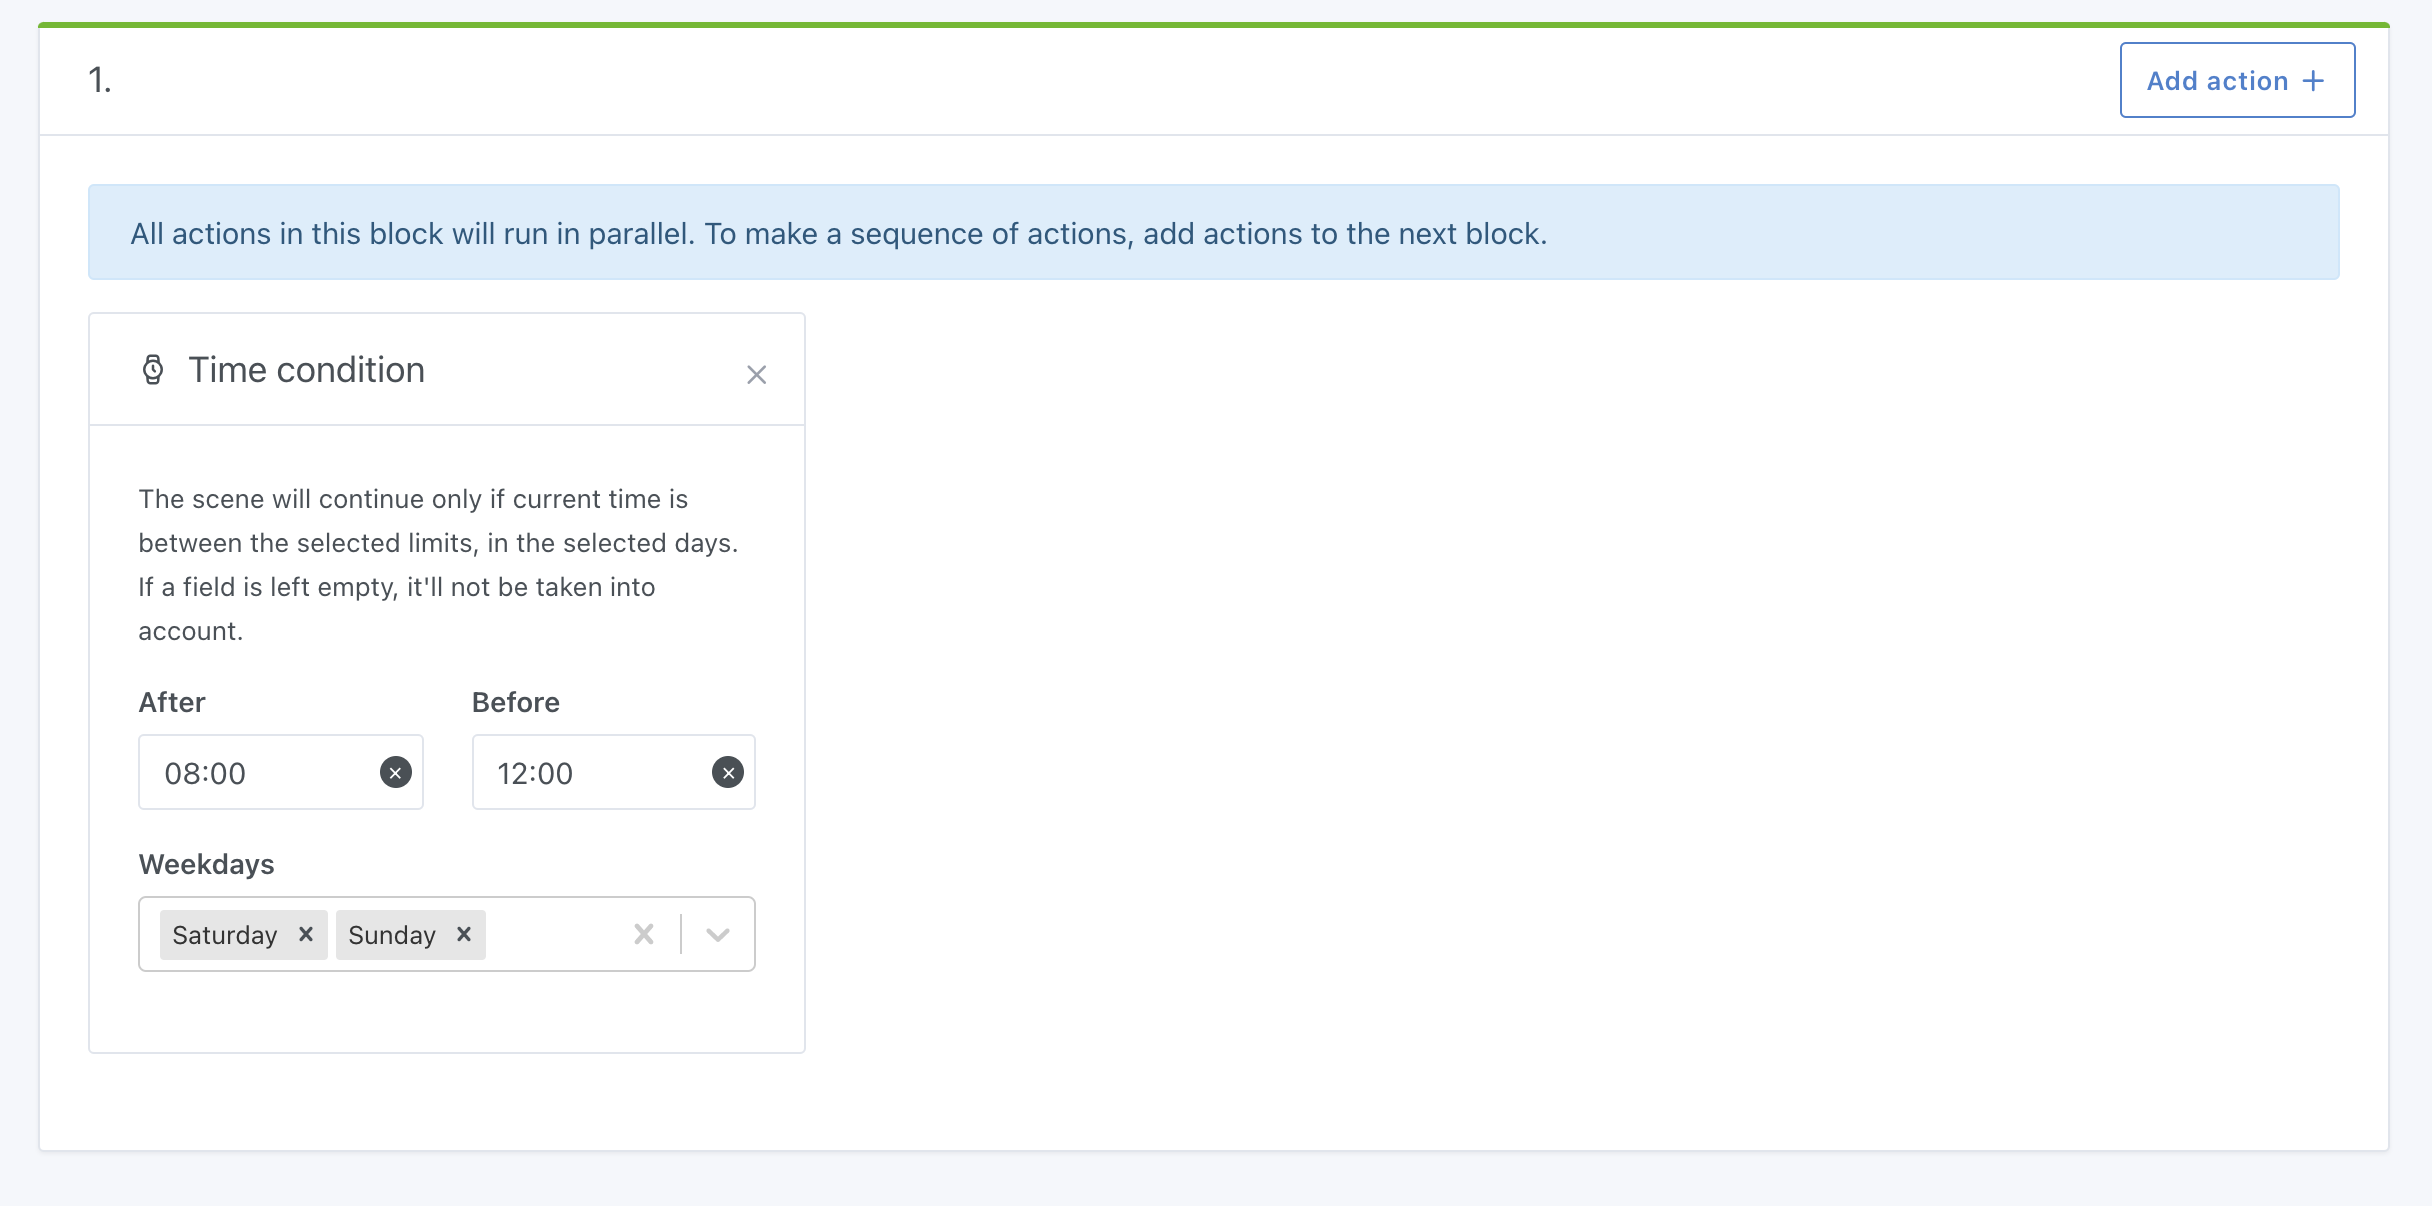
Example of a scene that will only run between 8 a.m. and 12 p.m. on weekends:

Time condition Gladys Assistant

Get the result of an HTTP request

Since Gladys v4.0.3, it is possible to make HTTP requests in the scenes.

Convenient for calling an external API in scenes.

From now on, it is possible to retrieve the response of the HTTP call, and to use the result of the request in the scenes.

For example, let's say you want to do a scene that will call Coinbase's API every morning to retrieve the price of Bitcoin, and send you a message with the price.

It is now possible, and here is an example in video:

Of course this is just one example among many.

You could request a weather API, traffic API, a sensor at home, IFTTT, and many others...

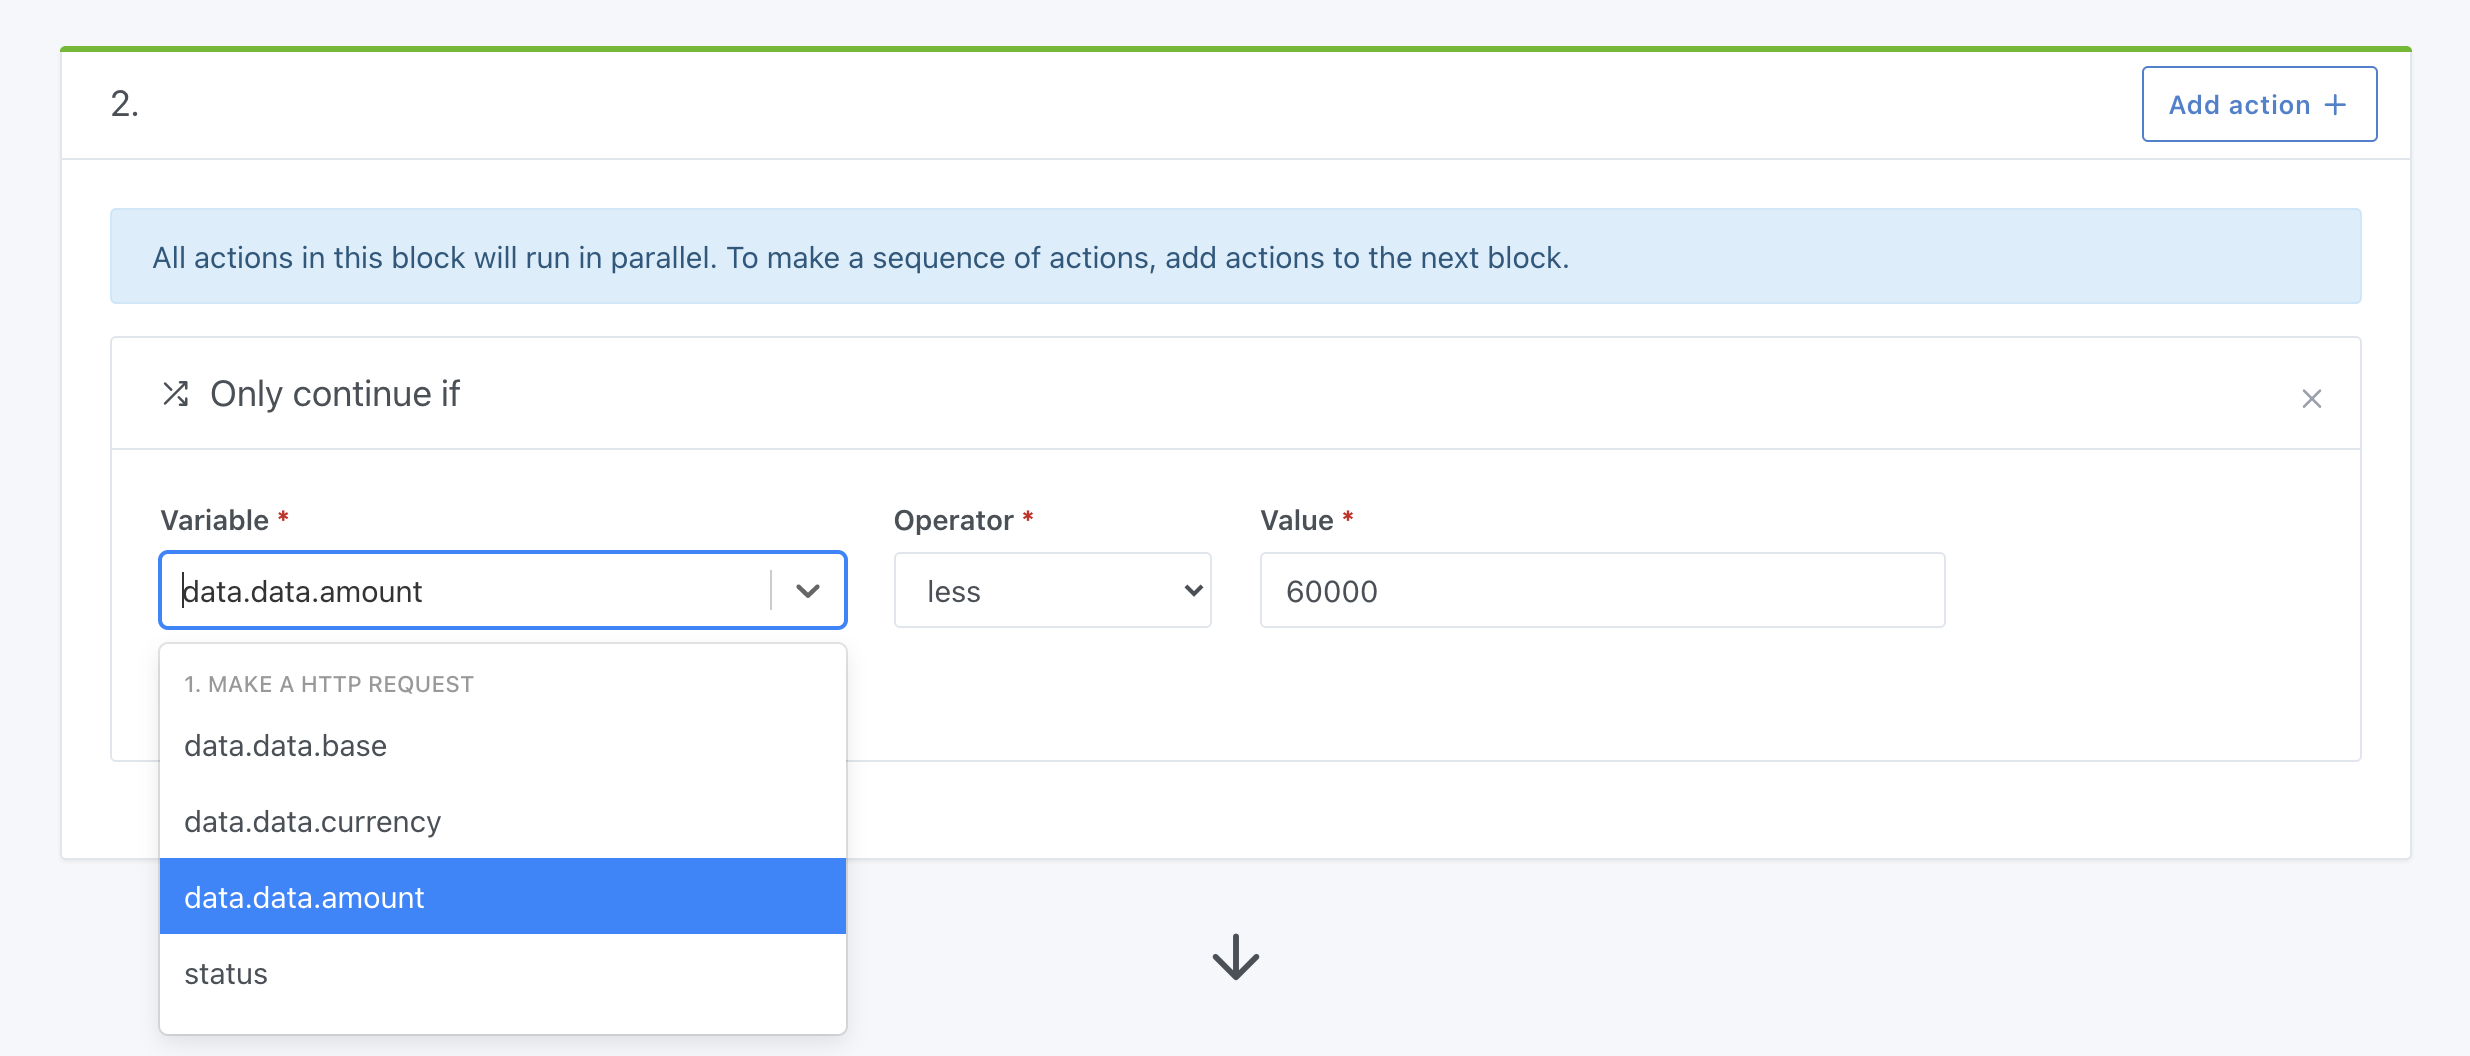
And that's not all! Variables retrieved in the HTTP call can be used in the "continue only if" condition, which allows you to verify that a condition is true.

Continue only if Gladys Assistant

Example:

  • Receive a message only if the outside temperature is < 32°F.
  • Receive an alert if a company stock you follow drops by more than 20%

Correction of bugs and typos in the interface

Many of you have reported small misspellings in the interface, or responsive bugs.

Without going into detail, here is the list of the various corrective commits for this update:

  • Fix #1147: make signup process more responsive #1147
  • Fix #1161: correct french typo #1161
  • Fix #1162: correct date format in french scheduled trigger #1162
  • Fix url in signup process 8ee5793
  • Add switch dimmer to supported feature types in dashboard box b740657

How to upgrade?

If you installed Gladys with the official Raspberry Pi OS image, your instance will update automatically in the coming hours. It can take up to 24 hours, don't panic.

If you installed Gladys with Docker, make sure you are using Watchtower. See the documentation.

With Watchtower, Gladys will update automatically.

Thanks to contributors

Once again, thank you to everyone who contributed to this release: whether it's coding, suggesting new ideas on the forum, or testing new features, every help is invaluable and makes the product complete!

· 4 min read
Pierre-Gilles Leymarie

Hi all,

Gladys v4.2.0 is out today! Already!

Since the launch of Gladys Assistant 4 last November, more and more contributors have made their contribution by offering new features on Gladys Assistant.

Since November, we've released 11 new versions of Gladys. That's almost 3 new releases per month. We're working hard!

What's new in version 4.2

Zigbee2mqtt

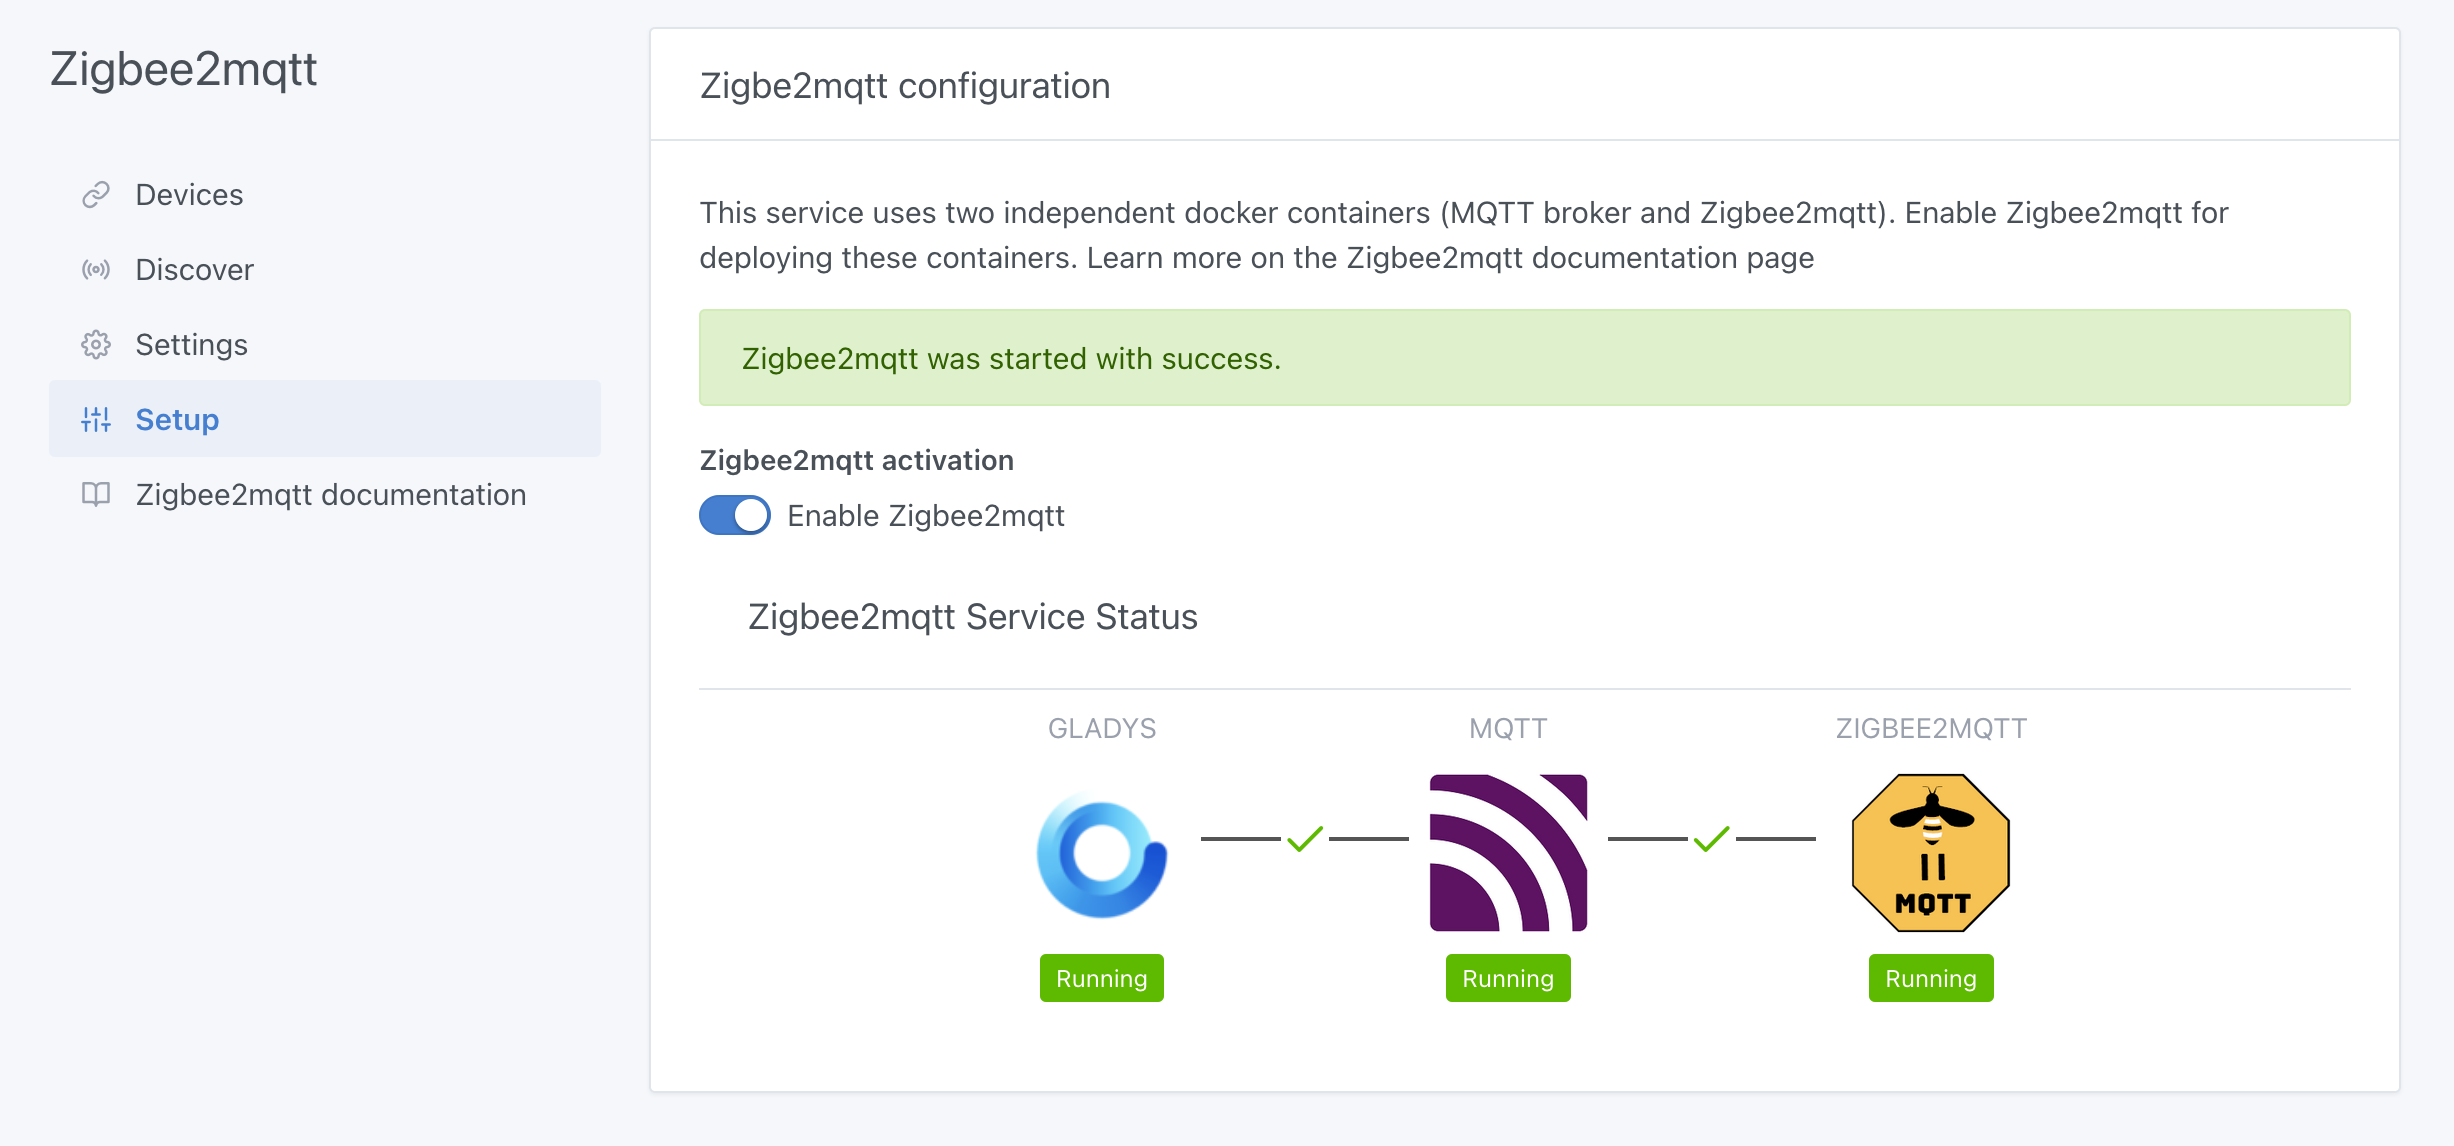
It's official, the Zigbee2mqtt integration is now integrated into Gladys 4 🚀

It is therefore now possible to control a wide range of Zigbee peripherals via a Zigbee USB key. Here is the list of supported devices.

Zigbee2Mqtt GladysAssistant

This is the result of months of work on the part of many members of the community. Thanks to Reno for the first initial development, thanks to cicoub13 for resuming development, and thanks to lmilcent for testing!

For the moment, all the peripherals are not necessarily perfectly managed, which is normal as we do not have all the unimaginable peripherals on earth. There may be some adjustments to be made that we will discover over the course of the use of this integration.

See the documentation for this integration.

Do not hesitate to give feedback on the forum if you come across a poorly managed device

Sunrise / sunset

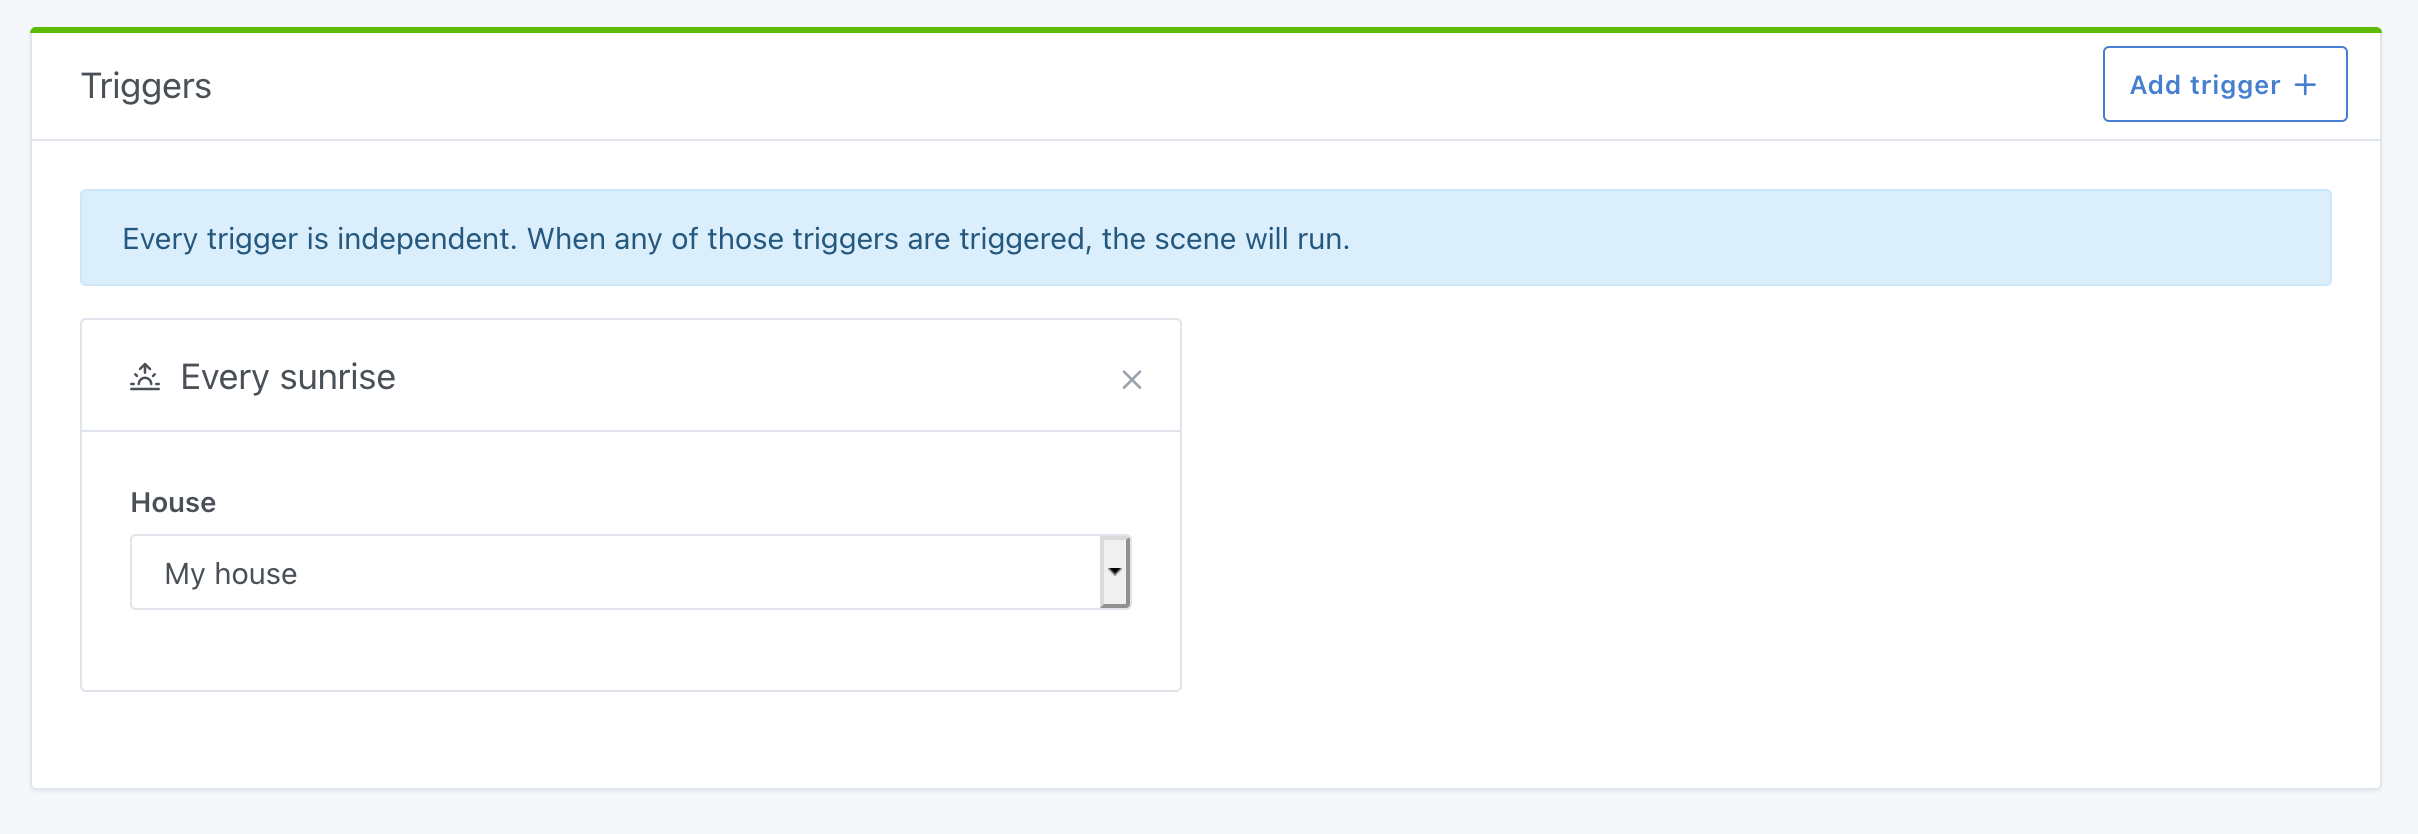
It is now possible to make scenes that are triggered at sunset or sunrise.

Sunrise

Thanks to Lokkye for the work done on this PR!

Philips Hue

We've updated the NPM dependency we use in the Philips Hue integration to it's latest version.

Some users had problems with discovering a Philips Hue bridge on their network because we were previously using Philips Hue's N-UpnP scan which is based on their online API.

We changed this function to go through the network UPnP scan, which takes place entirely locally without calls to Philips Hue servers. This should fix the issues some of you were having!

Brightness control on the dashboard

Thanks to the work of VonOx, it is now possible to control the brightness of your bulbs on the dashboard.

Brightness

Gladys Plus

I continued my work on optimizations and performance to improve the speed of access to Gladys Plus!

While researching, I noticed a way to reduce the load on Gladys Plus servers as well as on local instances.

This change drastically improves performances, and I can't wait to see in production what it will look like on larger instances (like Terdious) or instances with slow connections (like Mastho).

Major update of several internal dependencies

We took the opportunity to make major updates to some of the dependencies we use:

  • From Node 12 -> to Node.js 14 LTS
  • From Sequelize 4 -> Sequelize 6
  • We switched to the latest version of node-nlp, the library we use for language recognition in Gladys. According to the tests we did, the language processing model recognizes requests much better! On top of that, new sentences have been added to the weather module for richer discussions with Gladys 😄

Everything was not necessarily easy to do, but we are happy to have done it!

How to update?

If you installed Gladys with the official Raspberry Pi OS image, your instances will update automatically in the coming hours. It can take up to 24 hours, don't panic.

If you installed Gladys with Docker, make sure you are using Watchtower. See the documentation.

With Watchtower, Gladys will update automatically.

A new Raspberry Pi OS image

I take this opportunity to announce that we have a new Raspberry Pi OS image, which we build automatically based on the same build process that the Raspberry Pi foundation uses!

This image has several advantages:

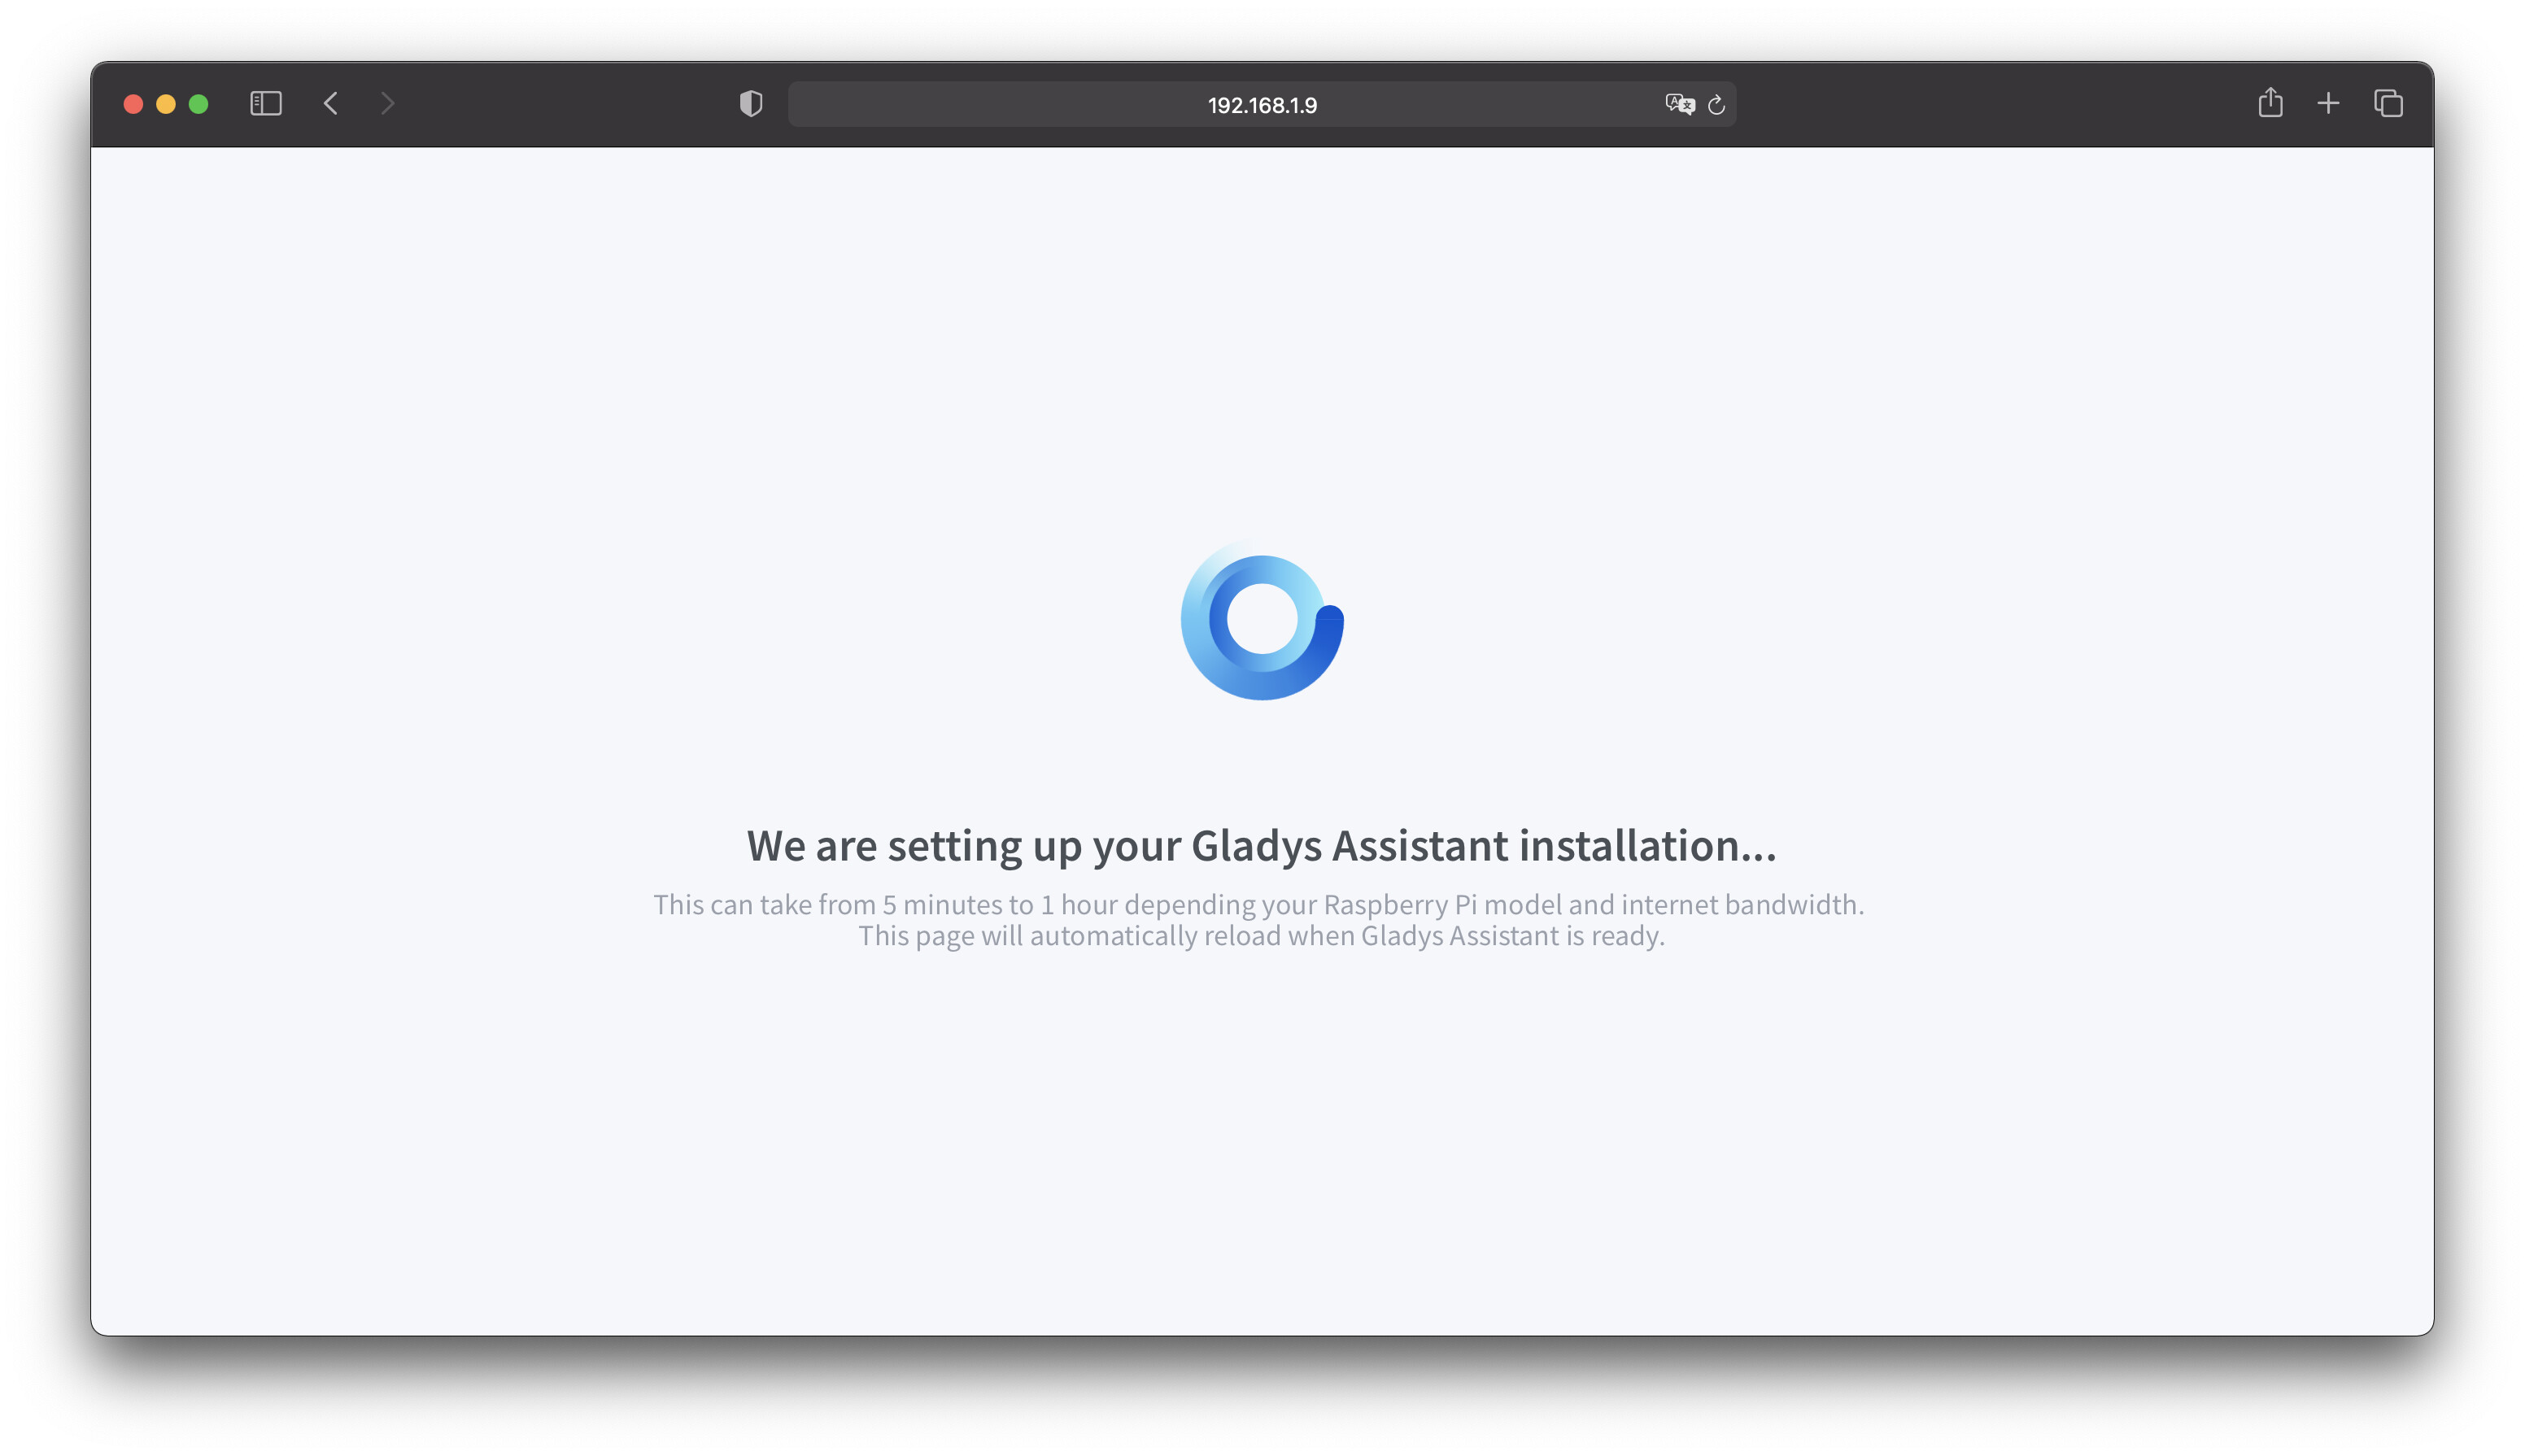
  • It is always up to date. When you install Gladys on a Raspberry Pi, this image will automatically search for the latest version of Gladys during installation. During the first start, you will see a waiting page during the automatic installation of Gladys 🙂

New RaspberryPi OS image

  • It is more easier for us, because now we can build a new image automatically as soon as the foundation releases a new Raspberry Pi model.

Many thanks to VonOx for the awesome work done. I could not have done better !!

Thanks

This new version is the perfect demonstration of the strength of open-source: to be able to do together what we would not be able to do alone.

Once again, the Gladys community has shown that it's here to develop together, test together, and move this project forward.

Thanks to everyone who contributed to this release 👏👏

Pierre-Gilles Leymarie

· 8 min read
Pierre-Gilles Leymarie

Hi all,

It's a big day, after almost 2 years of work by the whole community, Gladys Assistant 4 is available, for free download as usual!

Gladys 4 devices

You can embark on the adventure by following the tutorials:

Now let's go back to the decisions that led to this fourth version of Gladys Assistant 🙂

· 7 min read
Pierre-Gilles Leymarie

Salut à tous,

Cela fait déjà plusieurs mois que je vous parle de Gladys 4, la prochaine version majeure de Gladys.

Je voulais faire un petit état d'avancement des développements, vous montrer où la réflexion en est, et où le produit en est.

Peut-être que certains auront des remarques, des retours. N'hésitez pas: c'est l'objectif de ce post !